Archive for Software

Common Core in Action Part II

CCinAction2

I recently wrote about the video series I created for Pearson, entitled Common Core in Action.  I wanted to share one more screen shot from the videos and talk a little bit more about what using Hyperstudio can do to make videos more engaging and visually appealing for students.

Here is a screen shot from the video entitled “Common Core In Action: Adding Fractions”.

AddingFractions

The screenshot above is showing the portion of the video where I am adding two fractions with a common denominator of sixths.   The sixths are visually represented by purple one-sixth fraction strips.

I used Hyperstudio to create the stage for my video because I can move objects around the stage during the video.  In this case, I used the stack of one-sixth strips on the bottom of the screen to show two-sixths plus five-sixths as adding a set of 2 purple one-sixth strips and 5 more purple one-sixth strips to obtain 7 of the purple one-sixth strips.

The point in the video where this screenshot is taken, is where I am showing how the improper fraction seven-sixths, can be turned into a mixed number by bringing a red strip to the stage, which is worth one whole.  Lining up the purple one-sixth strips along the edge of the red one-whole strip, I am able to show that 6 of the one-sixth strips are equal in length to the one-whole red strip, leaving me with 1 one-sixth strip left over.  Having the ability to move around the fraction strips during the video makes it easier to explain visually why seven-sixths is the same as one and one-sixth.

Using the fraction strips is important to the Common Core Standards for explaining WHY a common denominator is needed when adding fractions, and not just having the student perform an algorithm by showing them “how” to add fractions.

EquivFractionPlaygroundImage

To give you a better idea of what the fraction strips can do for students when I use them in fraction lesson videos, I created a small video where I move around the fraction strips showing how to visualize equivalent fractions.  You can see that HERE.

In the screen shot above, I have created all of my fraction strips so that they are relative in size to the red one-whole strip.  For example, it takes 2 of the one-half strips to equal the one-whole strip, 3 of the one-third strips, 4 of the one-fourth strips, and 6 of the one-sixth strips.   Another reason I use Hyperstudio, rather than real fraction strips and a document camera to create the videos I teach with, is because I can create any size and color fraction strips I want.

If you would like me to create a lesson for you, please send me details about the manipulatives (like fraction strips) you would like me to use, along with desired colors, and I will design and create a personalized video lesson for you, on demand!


Creating More Engaging Videos

I wanted to share a blog post I wrote for my new business, On Demand Curriculum (www.ondemandcurriculum.com).   Normally, I don’t plan on posting the same content on both sites, but this one seemed appropriate here, since I am talking about the technology I used to create the Common Core in Action videos.

CCinAction

I recently finished designing and creating a set of professional videos for Pearson Higher Education called “Common Core In Action”.   It was such a fun project!  The videos are going to be used with math content texts for college students studying to be K-8 teachers. This particular set of videos shows how to teach some of the topics in elementary mathematics, to align with the Common Core Standards.

These videos would be a great resource for parents trying to understand their child’s homework, which could utilize many of these methods. Therefore, I am working with Pearson to try to get permission to set up a site where parents could view these valuable resources. Stay tuned!

I was given permission by Pearson to show a couple of screenshots from the videos.  I will talk about each screenshot in a separate blog post. The first video screenshot I want to show you is from a video entitled “Common Core in Action: Addition Algorithms”.

AdditionAlgorithm

To align to the Common Core State Standards when teaching addition, teachers often have the students use Place Value Disks. In this video I created a set of place value disks, where white disks are worth 1 (one) unit, and red disks are worth 10 (ten) units, to match the actual physical items elementary schools are using.   I also included 5-frames and 10-frames to help teach addition involving regrouping, which used to be called “carrying” when I was in elementary school.

I used Hyperstudio to design and build the background to my video because I wanted to be able to interact with the place value disks during the video, as I taught the lesson on adding whole numbers using place value.

In the screenshot of the video, the bottom row is comprised of the movable objects:

MovablePlaceValueDisks

I have created multiple copies of each object, sitting on top of one another.  During the video I “pick up” place value disks or 5-and 10-frames, as needed, and move them onto the place value board.   The eraser on the side of the screen (see the original screen shot) is used when I create subtraction videos, so that I am able to “erase” objects I am removing, or subtracting.

As I talk through the process of adding 28 and 34 in the video using place value disks, I actually move the disks into the appropriate columns in the place value chart shown.

ButtonToShowSum

The screen shot shows the point in the video where I have 2 ten disks plus 3 ten disks. I also have 8 one disks plus 4 one disks, but in this screenshot I have already regrouped 10 of the one disks to create a set of 10 ones inside of a 10-frame.  This left me with one 10-frame of one disks and 2 one disks left over.   The next step in the video would show me trading the 10-frame for 1 ten disk, and moving the ten disk into the “Tens” column.  This allows me to explain in arithmetic where the “carried 1” comes from.

When I complete the process, and have the final tens and ones disks in the place value chart, I relate the place value disks to the final numeric representation of the sum by hitting the button on the screen labeled “Sum”. The screen will then show the number 62 (which is later in the video than this screen shot), where the digit 6 represents the 6 red ten disks which will be on the screen and the digit 2 represents the 2 white one disks that will be left on the screen.

If you would like me to create a video showing how to use classroom manipulatives to teach a topic in your curriculum, please contact me at sue@ondemandcurriculum.com, and I would love to work with you!

To see the original blog post go here:  http://www.ondemandcurriculum.com/common-core-in-action-part-i/


Using Hyperstudio To Create Videos

HyperstudioLogo2

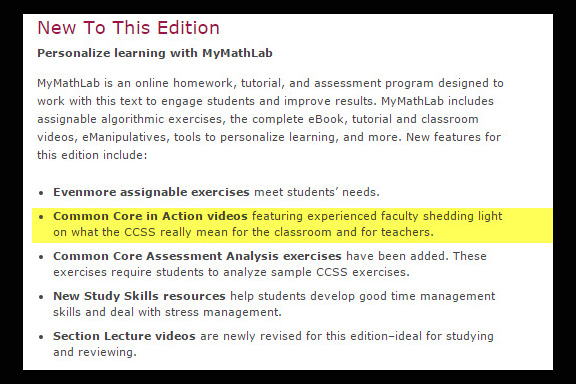
I recently finished creating a set of twenty professional videos related to the Common Core for Pearson Higher Education’s textbook: A Problem Solving Approach to Mathematics for Elementary School Teachers 12/E by Billstein, Libeskind and Lott.   The video series is called Common Core In Action.

CommonCoreWriteUp2
Screenshot taken from http://www.pearsonhighered.com/billstein-12e-info/features.html

Yup, I am the “experienced faculty shedding light on what the CCSS really means for the classroom and for teachers”.

I really enjoyed this latest video project for several reasons:

  1. This was one of the first times I was given the freedom to use any platform I wished to use to create the videos.  I chose Hyperstudio 5.0 because I could move objects around the screen during the videos, which is very important when teaching how to use manipulatives for the Common Core.
  2. I was not required to create videos according to a textbook author’s wording and style. (These are the types of videos I have mostly created for textbook companies) The Common Core videos were to go with a textbook, but they were not section videos; they were strictly videos to show how the Common Core would have teachers approach particular topics from the textbook.
  3. I got to learn more about the Common Core, and was given a consultant to work with me to make sure the videos were true to representing how the new standards approach the particular areas the videos were covering.

I am trying to acquire permission to show one of the Common Core in Action videos, but since Pearson Higher Education owns all the work I have done for this project, I cannot show anything without their permission.  However, I did want to show you how much more interesting a video can be with interactives, so I created this quick (very quick!) video using Hyperstudio 5.0 and Camtasia Studio to show how you could teach equivalent fractions: Why use Hyperstudio for Videos .

If you would like me to create a video tutorial for you, you can go to my new website at www.ondemandcurriculum.com and contact me.


On Demand Curriculum – My Latest Adventure

Blog Post Header On Demand Curriculum

I have been very busy these past few years trying to build up my contract business with textbook companies.  I have created videos, PowerPoints, and other types of lessons for several large companies.

I was teaching full time and doing these contract jobs, trying to build up my business enough to retire from teaching in the classroom….well, that time finally came.   I retired in May 2015 from teaching at Mesa Community College, and have spent the past few weeks building a new business website so I will be able to share my experience with students, teachers, parents, home school businesses, along with other curriculum creation companies.

I am starting On Demand Curriculum by building up the first area, On Demand Math.  My goal is to make personalized math lessons and tutorials for students, based on their learning style, on demand.   In my experience, students who asked me a question during office hours tended to forget what they learned more quickly than students who asked me a question through email and receive a tutorial that I built just for them that they can watch as many times as they need to.  I want to take that concept and expand it so that more students across the globe can receive help, based on their individual needs.

I also realize that there are many parents out there struggling to help their child with their math homework.  I want to be there for them as well.   A quick tutorial, based on the question they are trying to help their child with, might make a real difference in the child starting to enjoy math (and the parents).

Please help me spread the word that I am now available to help everyone succeed in all levels of math!

You can follow On Demand Curriculum on the following social media sites:

Twitter as @OnDemandMath
Pinterest as OnDemandMath
Instagram as @OnDemandCurriculum
Facebook as On Demand Curriculum

Find out more information at www.ondemandcurriculum.com


Doceri Workshop at ICTCM 2014

Here is a link to the workshop I did at ICTCM 2014  in San Antonio this year.
Presenting lessons and creating videos using Doceri on the iPad.

https://sites.google.com/site/ictcm2014glascoe/


New Tech to Try!

I apologize for not writing more posts this semester, but I have been swamped with work and play 🙂

I just received the new wi-fi Livescribe smartpen called SKY today and I promise to write a blog post soon about the features and how I plan on using it.  Wi-fi opens the potential of the smartpen to be even smarter!! I can’t wait!

I have been using Doceri 2.0 along with the Mobi 360 w/ clickers in my math classes and plan on updating all of you on how well that is going (it is going REALLY well, by the way)  and how I have used them with my students.

Stay tuned….


My Student Hyperstudio Projects

Student Hyperstudio5 Projects

The final project I had my Math For Elementary Teachers do for the course was to create an interactive Hyperstudio Project.


The projects are too large to be viewed well inside my blog, so I have created a website to house them. The website is best viewed using Safari if possible, if not, just ignore the browser warning, as I have used a beta version of Hyperstudio to export them into HTML5 .

I have many of my student’s projects posted on a THIS WEBSITE.    Enjoy!


GlogsterEDU Projects for Students

CREATIVE ONLINE PROJECTS

Next week my students in my Math For Elementary Teachers class will be creating a Glog:  an interactive, online poster.   GlogsterEDU will allow them to create their Glog for free and publish it to their Google Website for the class.

I just finished creating a new Glog to show a few uses of the Livescribe smartpen in the classroom.  I plan on using this as an example when I teach them how to use GlogsterEDU.

Link to the Glog if you cannot see it above.

I will post some of their work when completed!


Getting Organized

ADDING MY VIDEOS TO THIS BLOG

I have heard from several people that they would like to see some of the educational videos I have created.  I realize there was a pull down menu at the top of my blog for it, but I never actually organized the content I have created in the past.

In the past 6 months I have had to wipe both my Mac and my Windows machine (long stories), so some of my videos are now “lost’, but luckily YouTube still has a small collection.

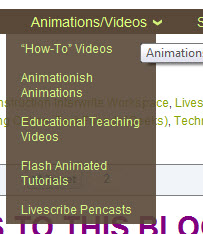
I finally got organized today and separated my videos into categories.  If you look along the top of my blog, you will see a category called “Animations/Videos” :


Most of my videos fall in to four categories of  “How-To” videos, “Educational Teaching Videos”, “Flash Animated Tutorials”, and “Livescribe pencasts”.  I will be adding some Animationish videos after this Fall when I have my students creating some.

I created the “How-To” videos to teach others how to use software or hardware.  Here are the categories I have in that section:

I plan on adding more videos to this section in the near future, so some of the categories do not have any links yet.

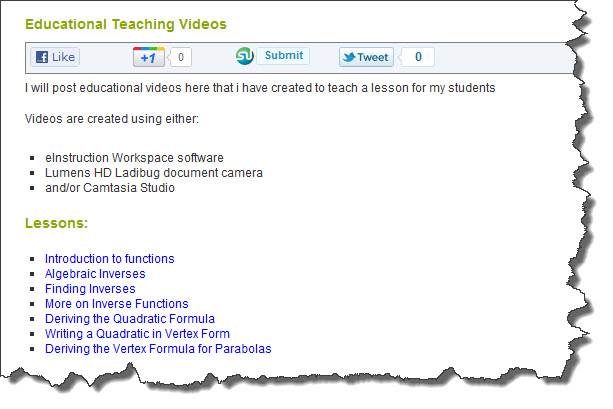
The next main category I have been creating videos for is in “Educational Teaching Videos”.  These are short videos I have created for my students to introduce a topic we are studying in the class.

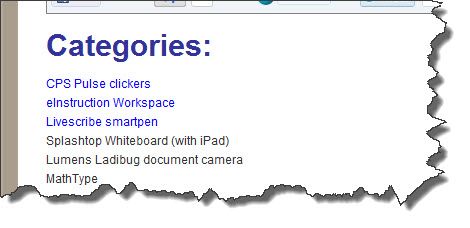
As you can see when you look through the Educational Teaching videos, I was trying out several types of hardware/software to see what worked best.   I used the eInstruction Workspace software for a “whiteboard” in some videos, and recorded and edited with Camtasia studio.  In other videos I used a Lumens HD Ladibug document camera.  I found the document camera to be better for me when I am actually needing to record working with actual objects like base ten blocks and fraction circles.   I will hopefully be making more videos using these this semester. I will try to keep up with posting them here so I don’t lose them again!!

Most of the tutorials/lessons I have created for my students in the past year are Livescribe pencasts, but I find when I need the lesson to be more visual, a video is better.    My livescribe pencasts are organized by topic on THIS PAGE.  I have quite a few pencasts collected there.   When I had to wipe my computers, I lost all the original pencasts, so for now I cannot change any of those pencasts into PDF’s to download.

Lastly, about six years ago I started created Flash animated tutorials to help my students in my Math For Elementary Teachers classes better visualize the math they will be teaching. I strongly believe visualization is key to understanding!

The Flash animated tutorials are housed on a separate area (outside of my blog).   They are organized by arithmetic topic:

For example, clicking on the “1/3” would take you to the fraction tutorials, and the “2” will take you to the multidigit whole number operations.  This type of tutorial takes me a lot longer to create, so I do not have many in some areas (like decimals).   Instead, I am starting to create more interactive tutorials using Hyperstudio.  To see a few of those interactive tutorials, CLICK HERE.

These are still a work in progress, but I promise to continue adding here so check back!


New Livescribe Connectors For OneNote and Google Sites!

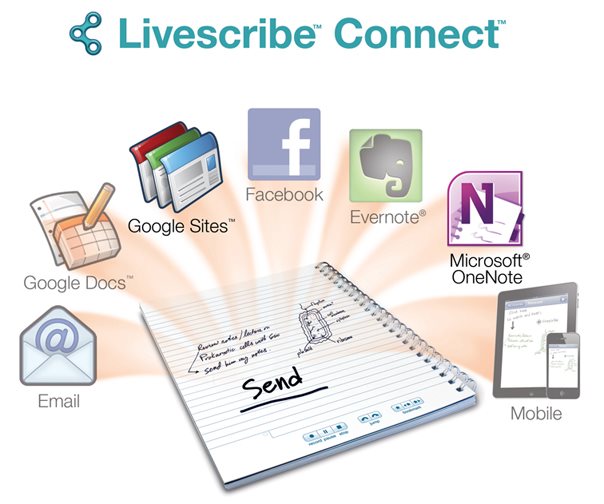
*Image taken from the Livescribe Facebook Page.

I downloaded the latest version of Livescribe desktop to try out the NEW connectors.   Livescribe just added Microsoft OneNote and Google Sites to their list of connectors!   Download the lastest desktop at:  http://www.livescribe.com/en-us/starthere 

connect
brought to you by Livescribe

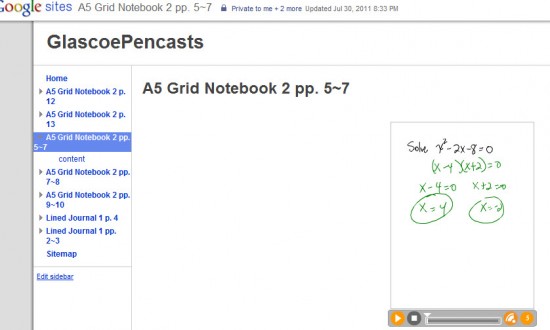
Here is a screenshot of a Google website I created.  You can use the launch-line feature and write the words “Google Site” (the pen recognizes the words you want pretty quickly – or you can make a short cut like “sites” for it)


Every time you sync a new pencast to Google Sites, it creates a new webpage on your site and embeds the playable pencast on the page.  You can rename and edit the page any way you would like after the pencast is uploaded.    What a great way to share a test key or answer student questions so all students have access to it!

The other new Connector is for Microsoft OneNote.   I have read a lot of feedback from folks REALLY wanting this connector.   Since I use Evernote (a LOT), I haven’t really played with OneNote, but this gave me the perfect excuse to crack it open and start playing!

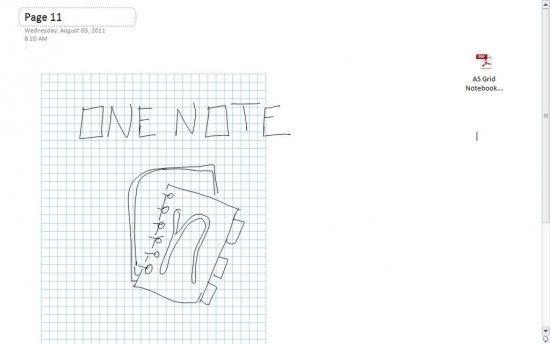
After syncing your pen using the OneNote Connector, when you open up Microsoft OneNote you see two things:

1)  A rough screen shot of your pencast, and

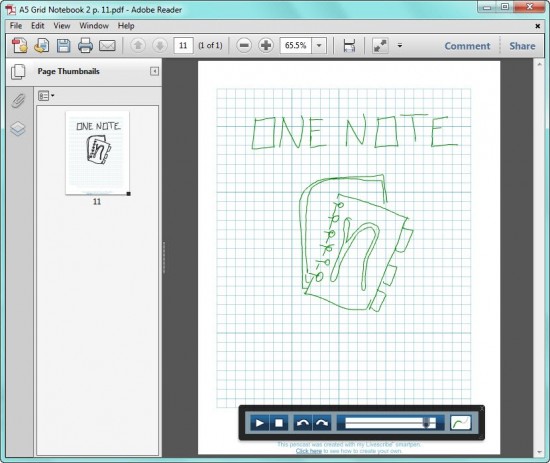
2)   An embedded Pencast PDF file that holds the entire pencast (includes both synced audio and animation)

If you double click on the PDF file in the upper right, it opens Adobe (10 or higher) and shows you the actual animated pencast.   This pencast is still in your OneNote notebook, but can also be shared with others.

The PDF pencast comes with a player that allows you to play, stop and scrub through the pencasts as you want.

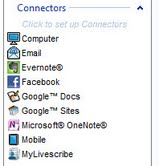
You do not have to use launch-lines to use the connectors – they also show up in a menu on the left side of your Livescribe desktop:


All you need to do is sync your pen and then drag any “page” from your notebook onto one of the connectors – and you are done!

I already use the other connectors all the time, now I have even more choices to make my life easier.

I am looking forward to being able to create a Google Website that houses all the pencasts I upload for my students, so I can just post the link to the website for my students, rather than having to embed each new pencast I make manually.    This update for Connect is extremely helpful for me and will save me a LOT of time this semester!!

Loving all the new updates from Livescribe as they listen in on what their users really need “now”.  I can’t wait to see what is next!


Analytics Plugin created by - Powered by Womens Sunglasses and Human Services Degree.