Archive for Mathcast

My Student Hyperstudio Projects

Student Hyperstudio5 Projects

The final project I had my Math For Elementary Teachers do for the course was to create an interactive Hyperstudio Project.


The projects are too large to be viewed well inside my blog, so I have created a website to house them. The website is best viewed using Safari if possible, if not, just ignore the browser warning, as I have used a beta version of Hyperstudio to export them into HTML5 .

I have many of my student’s projects posted on a THIS WEBSITE.    Enjoy!


Creating a Text Embedded Interactive Worksheet with a Livescribe Smartpen

EMBEDDING TEXT BEHIND A LIVESCRIBE PENCAST PDF

Recently I learned how to embed text behind a Livescribe pencast and it has changed everything!

I created a short interactive worksheet to show what can be created with this process.   The following is a screenshot of the text embedded pencast because I cannot embed a PDF file (yet) into a website.   A link to the actual pencast PDF is below the screenshot.

Pencast PDF with text in the background
(you must have Adobe Reader 10.0 or higher to view this interactive PDF)

If that does not work, I put a link on my website for you to click on OUTSIDE of WordPress
(I have some issues with opening PDFs inside WordPress – if anyone can help me to embed
a PDF in WordPress or a website I would really appreciate it!)

As listed in the pencast, the steps to embed the text in the pencast PDF are as follows:

1.  Print off the text file onto Livescribe dot paper (I used college-ruled dot paper in my printer)

2.  Record a pencast on top of dot paper that has the text printed on it (the text shows you where to write!)

(sorry about the poor photo quality)

3.  Connect your smartpen and upload your pencast as a PDF (use the “Computer” connector)

As you can see in this screen shot, the pencast looks pretty strange without the text behind it!

4.  Save the original text document as a .jpg (image file) – to do this you must first save it as a PDF and then you can use Adobe Acrobat Pro or the free online utility Zamzar (www.zamzar.com) to save your PDF as a .jpg file

5.  Open the pencast PDF in Adobe Acrobat Pro or PDF Pro (http://epapyrus.com/en/)  so that you can add a watermark to the PDF file

6.  Add your .jpg text file as a watermark to your pencast PDF and re-save the PDF

7.  The new pencast PDF can be viewed by anyone with Adobe Reader 10.0 or higher


Please add comments on this blog if you know of other free ways to save a text document as an image file and also if you know of other (especially FREE) programs that allow the user to edit a PDF.

Please send me the projects you make – I would love to see them!


Getting Organized

ADDING MY VIDEOS TO THIS BLOG

I have heard from several people that they would like to see some of the educational videos I have created.  I realize there was a pull down menu at the top of my blog for it, but I never actually organized the content I have created in the past.

In the past 6 months I have had to wipe both my Mac and my Windows machine (long stories), so some of my videos are now “lost’, but luckily YouTube still has a small collection.

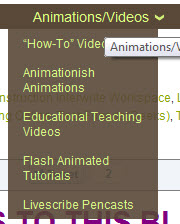
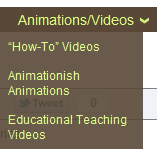
I finally got organized today and separated my videos into categories.  If you look along the top of my blog, you will see a category called “Animations/Videos” :


Most of my videos fall in to four categories of  “How-To” videos, “Educational Teaching Videos”, “Flash Animated Tutorials”, and “Livescribe pencasts”.  I will be adding some Animationish videos after this Fall when I have my students creating some.

I created the “How-To” videos to teach others how to use software or hardware.  Here are the categories I have in that section:

I plan on adding more videos to this section in the near future, so some of the categories do not have any links yet.

The next main category I have been creating videos for is in “Educational Teaching Videos”.  These are short videos I have created for my students to introduce a topic we are studying in the class.

As you can see when you look through the Educational Teaching videos, I was trying out several types of hardware/software to see what worked best.   I used the eInstruction Workspace software for a “whiteboard” in some videos, and recorded and edited with Camtasia studio.  In other videos I used a Lumens HD Ladibug document camera.  I found the document camera to be better for me when I am actually needing to record working with actual objects like base ten blocks and fraction circles.   I will hopefully be making more videos using these this semester. I will try to keep up with posting them here so I don’t lose them again!!

Most of the tutorials/lessons I have created for my students in the past year are Livescribe pencasts, but I find when I need the lesson to be more visual, a video is better.    My livescribe pencasts are organized by topic on THIS PAGE.  I have quite a few pencasts collected there.   When I had to wipe my computers, I lost all the original pencasts, so for now I cannot change any of those pencasts into PDF’s to download.

Lastly, about six years ago I started created Flash animated tutorials to help my students in my Math For Elementary Teachers classes better visualize the math they will be teaching. I strongly believe visualization is key to understanding!

The Flash animated tutorials are housed on a separate area (outside of my blog).   They are organized by arithmetic topic:

For example, clicking on the “1/3” would take you to the fraction tutorials, and the “2” will take you to the multidigit whole number operations.  This type of tutorial takes me a lot longer to create, so I do not have many in some areas (like decimals).   Instead, I am starting to create more interactive tutorials using Hyperstudio.  To see a few of those interactive tutorials, CLICK HERE.

These are still a work in progress, but I promise to continue adding here so check back!


New Livescribe Connectors For OneNote and Google Sites!

*Image taken from the Livescribe Facebook Page.

I downloaded the latest version of Livescribe desktop to try out the NEW connectors.   Livescribe just added Microsoft OneNote and Google Sites to their list of connectors!   Download the lastest desktop at:  http://www.livescribe.com/en-us/starthere 

connect
brought to you by Livescribe

Here is a screenshot of a Google website I created.  You can use the launch-line feature and write the words “Google Site” (the pen recognizes the words you want pretty quickly – or you can make a short cut like “sites” for it)


Every time you sync a new pencast to Google Sites, it creates a new webpage on your site and embeds the playable pencast on the page.  You can rename and edit the page any way you would like after the pencast is uploaded.    What a great way to share a test key or answer student questions so all students have access to it!

The other new Connector is for Microsoft OneNote.   I have read a lot of feedback from folks REALLY wanting this connector.   Since I use Evernote (a LOT), I haven’t really played with OneNote, but this gave me the perfect excuse to crack it open and start playing!

After syncing your pen using the OneNote Connector, when you open up Microsoft OneNote you see two things:

1)  A rough screen shot of your pencast, and

2)   An embedded Pencast PDF file that holds the entire pencast (includes both synced audio and animation)

If you double click on the PDF file in the upper right, it opens Adobe (10 or higher) and shows you the actual animated pencast.   This pencast is still in your OneNote notebook, but can also be shared with others.

The PDF pencast comes with a player that allows you to play, stop and scrub through the pencasts as you want.

You do not have to use launch-lines to use the connectors – they also show up in a menu on the left side of your Livescribe desktop:


All you need to do is sync your pen and then drag any “page” from your notebook onto one of the connectors – and you are done!

I already use the other connectors all the time, now I have even more choices to make my life easier.

I am looking forward to being able to create a Google Website that houses all the pencasts I upload for my students, so I can just post the link to the website for my students, rather than having to embed each new pencast I make manually.    This update for Connect is extremely helpful for me and will save me a LOT of time this semester!!

Loving all the new updates from Livescribe as they listen in on what their users really need “now”.  I can’t wait to see what is next!


Screencaptures by TechSmith for the iPad!

While reading through posts on Google+, Facebook and Twitter by my PLN, I came across this valuable new FREE app for the iPad!   I use TechSmith products (Camtasia, Snagit and Jing) all the time on my laptops, but always wanted to have the same functionality for my iPad.  Not only did TechSmith follow through, but they made it FREE!

Opening up the ScreenChomp app, you see a blank whiteboard.

They have given us 12 colors to choose from (but I would like to see a slider for SIZE of the pen at some point in the near future!), an eraser and a record button – yes ScreenChomp will record a video of you writing and speaking at the same time!

When you save your file you have the option of saving it to the “cloud” by hitting the ScreenChomp.com button or sharing it on Facebook.

After saving your screencast, you have three options for sharing:   You can copy the link, email it or Tweet it!  Here is a link to the actual video I just made.   I need to find a way to embed the video without having to go through another application. Suggestions?

I think this will be a GREAT way to answer student questions from my iPad!  I just have to create a quick screencast on my iPad and then send it to them.   Can’t wait to try it out!


Making Math More Accessible For ALL Students

Reaching Different Learning Styles Through Technology

As you can probably tell, I have 2 passions that drive my teaching….technology and helping students.

My latest journey has been traveling down a path to find ways to help reach the different learning styles of my students. In turn this will help make my math courses more accessible to students who require either text, speech or visual aids because of physical or learning disabilities.

I started with the Livescribe smartpen to turn student notes into animated text with sound.  Then I tried to transcribe the text from the pencast using Dragon Naturally Speaking ,which works GREAT if I am speaking into my computer, but the student pencasts don’t pick up my speaking as well because I am walking around the room, so I am not near the pen most of the time.

Since Dragon cannot transcribe the text WHILE I am teaching from the Mobi software, then I needed to find a way to record my speaking during class and then download it into my computer so Dragon can create the transcript.  I spent some time today looking for options that would not require me purchasing a hand-held recorder.

I have a Plantronics Discovery 975 bluetooth headset that pairs with both my computer and also with my Droid X cell phone.   I use it with my computer and Dragon to ‘speak text’ into many programs on my computer, including Word and email (I still need to try it with MathType!).

I thought I found the perfect mobile solution…to be able to walk around the room and teach while wearing the bluetooth headset, but have the audio transcribe directly onto my phone!  I purchased the Droid version of Dragon called flexT9 …great idea and it works perfectly…except flexT9 does NOT support bluetooth headsets yet.   I can still use it for transcribing speech to text on my phone, but I have to be close to the phone mic.  It is an amazing app for $4.99!

I started looking for a voice recording app for my Droid that would support bluetooth.

I found Voice2Do (FREE).  It is the ONLY voice recorder I found that supports bluetooth.  I recorded a short message from my bluetooth headset to my Droid X (which was across the room) and then emailed it to my computer (to email the .wav file you must purchase the professional version).    Finally, I had Dragon transcribe the audio file and it worked GREAT!

I plan on playing with it for a couple more days and then trying it out in my classes.   My goal is to have the Livescribe pencast student notes and the Workspace board notes for visual learners, but then take the audio for the lesson and create a written transcript, which can also be read out loud by most computers, for students whose learning styles require reading or hearing the information.

I will post a link when I get it all put together.


Creating INTERACTIVE activities with HyperStudio5!

Link to the official Hyperstudio website

In my spare time (ha ha) I have been playing with Roger Wagner’s Hyperstudio 5.   (Luckily Roger Wagner himself has been helping me!!)  What a fun program!    My goal is to create more INTERACTIVE activities and tutorials/videos for my students, without all the work of Flash.   Hyperstudio fits that goal amazingly well!   It is similar to PowerPoint, but far more incredible in my book!

I “finished” my first final draft (I keep “fixing it” so it is forever in draft mode) of an interactive tutorial on introducing combinations and counting, and posted the project on a new area of my website with the button “HyperStudio Projects”.

Before clicking on the link below that will take you to the Hyperstudio stack, you must first make sure you are using either Safari or Internet Explorer, because these are the only browsers that have the Hyperstudio web-brower add-on for now.   To get the browser add-on, go to:  http://www.mackiev.com/support_hs.html , click on the proper computer type, then get the browser add-in for either Safari or Internet Explorer, then you will be able to view and PLAY WITH the activity.

Here is the direct link to my first project: http://www.tech4mathed.com/HyperStudio/IceCream_SG.html

If you have the browser add-on correctly installed you should see the following screen:

Once the stack is finished loading, the screen should look like:

Now you are ready to click on “go to STORY”.

I created the story like a video, and I narrated every screen, so you can  hear the narration if you click on the button. The audio level needs some work, some of the narration is too quiet and I will need to redo those sections.  The most fun part of it, however, is the INTERACTIVITY that was easy to create!

In this activity, I created an Ice Cream Playground, where you can actually move around all the objects on the page to explore and find the answer before viewing the explanation of the solution.  My 14 year old son did all of the artwork for me!   It is wonderful having a live-in artist on hand!

Please give it a try and let me know what I can do to make it more interesting for my students.   I also need to know if you are able to view it on a Mac and on a Windows machine.  Some Windows machines can view it and some cannot, so I am trying to trouble-shoot which versions of Windows have difficulty to help find a fix for that.

I am excited to make more projects and play with Hyperstudio!


Training My Dragon!

Dragon Naturally Speaking Web Link


I have started on a quest to make math more accessible!   I recently purchased Dragon NaturallySpeaking, Premium ver 11.0.   It just came today and I have been playing with it to train it to trancribe my voice.     So far it has  done a great job in Word, but then I decided to have it transcribe the audio file from the Livescribe pencast below.

Link to pencast


When the pencast is still on your desktop, you can export the audio separately.  I then imported the audio file directly into Dragon and the original transcipt is shown below (I just cropped a small part of the transcript for you to see).  I still have a lot of “training” on Dragon to do, but it didn’t do a bad job for the first try!  It certainly has potential to help create a transcript for my pencasts for students who need one.


(click on the image to see a larger version of the text)

Livescribe also has transcription software you can purchase called “MyScript”.  Here is a link to the software.   It has some difficulty transcribing the math, but here is the first pass it made:

(click on the image to see a larger version of the text)

My next task it to to learn to use MathType,

together with Dragon, to create equations that can be read aloud for students.   I will post when I make some progress there.  🙂


Off To A Great Semester With Technology!

A new semester has begun and I have added a few new ways to help my students succeed.

  1. I borrowed my colleague’s idea to have 2 students take notes during every class using a Livescribe smartpen.  I then upload the notes to their class website, and post a link  in the calendar on the day the notes were taken.

I created a webpage to house the daily notes for each chapter, starting with our first chapter:  Chapter 9

2.  I use a Mobi (from eInstruction) to present the lesson from anywhere in the room.   An especially nice feature of the Mobi software, called Workspace, is that I can save the board notes and export them to a PDF file.  I place on link in the calendar to the board lesson on the day the lesson was given.

*to see the actual board notes, you must go to the calendar and click on “board notes”, since they are an attached PDF file, I cannot link to it here.

3.  The students use an online program to do their homework, which sends me a screen shot when they need help on a particular problem.  Instead of trying to type back a response to them, I fully explain their solution using a Livescribe smartpen.  I then send them the link to the pencast, and I also created a webpage to house all solutions to student homework questions.

*here is the link to the page that contains all the homework solutions

Here is one of the solutions I wrote to my students just today:

This is just the first week of class, and the students have shown a positive reaction to these extra support features I have included on my website for them.   I look forward to seeing how the semester progresses!
*To see more of my college website go to:  Glascoe College Website .  I built the website using Dreamweaver.
*All screenshots were taken using TechSmith Snagit


A Leading Teaching/Technology Blog and Google

One of my favorite blogs to follow is Free Technology For Teachers.  I have followed Richard Byrne’s blog for over a year now and have found many fantastic, not to mention FREE tools for teachers.

I was there again yesterday looking for some information about Google Apps (I really do go to his blog first when looking for information about teaching with technology!)  and I found exactly what I was looking for!   He has given me permission to share his tutorials with you on my blog.   He has created several fantastic resources about using Google for Teachers, and Richard is a Google Certified Teacher.

Here are a few of the Google Tutorials he has built.  You can download them for free on his website at the following link:   Google Tutorials

Google for Teachers Google for Teachers II Beyond Google

Richard Byrne keeps up on the lastest free technology out there, and has quite a few Free Downloads on his website!

If you are looking for information on how to create blogs, website or videos, his blog is perfect for that as well!   His blog was awarded Edublog’s ” Best Resource Sharing” and “Best Individual” award in 2009.

Check out his blog at   www.freetech4teachers.com/


Clip to Evernote


Analytics Plugin created by - Powered by Womens Sunglasses and Human Services Degree.