This is the 2nd semester I am flipping my Intermediate Algebra classes. The students are required to access the online ebook and take notes BEFORE coming to class. I have Livescribe pencast examples available for them to view on the course calendar as well. For more information on how I am flipping my classes, see the article I wrote for eCampus News.
Flipping the class frees me up to have the students do group work and activities during class to reinforce the topics from the lesson. I can more easily work individually with students having difficulty, while the rest of the students are helping one another.
I was awarded a chance to teach in the iPad classroom this semster, so I have been looking for ways to have my students create and share on the iPad, rather than just use it as a calculator or to search the internet.
Today my students were working in groups on a handout. After completing the page, each group was assigned 1 of the problems and required to write their solution or graph on an iPad to share with the class. The application we are using on the iPad is called Doceri 2.0 (previous blog post about the app). It enables students to show their solution as an animation or video. Students can even edit their work before exporting it as a video. Since the classroom can get pretty loud, I had them record the animation, while picking up the sounds from the classroom (then I deleted all sound before uploading the following videos to YouTube, to protect the students’ privacy).
To present their animation, each group had one member connect their iPad to the Apple TV that is in the room and then “play” their animation. We discussed the group’s solution or graph and answered any questions before the next group presented to the class. I was really pleased with how well it worked!
I was able to get permission from a few students to share their work.
This first video is a student’s graph from today’s flipped Algebra class. They were to graph the linear equation by plotting points. The student chose to have graph paper as their background for their animation.
The second video shown here is another graph done by a different group/student. This student found the x-and y-intercept of the linear equation and then graphed the line.
The third video was created by a student who was given a problem to solve a formula for a given variable.
The students seem to be enjoying the experience!
I have really enjoyed watching them work through the problem, as opposed to just looking at their final solution/graph. If the classroom was quiet (but how much fun would that be??), I would have had them explain their steps in the video.
I will post more of their work as the students progress in their math ability and their ability to show their solutions on the iPad! This is only the 2nd week of class, and they have progressed quite a bit already. Many of them had never used an iPad before, and none of the students had ever used Docer 2.0. I am really proud of how hard they are working to succeed in my class!
I had given up on graphing calculators for a while, since I really wanted the students to engage more in class and use clickers. I found the perfect balance recently!
The calculators by themselves are pretty amazing, but there is a learning curve that made it too much for me to want to use them with my students. However, I was recently introduced to the TI Navigator system, which turns this amazing calculator into an even more amazing clicker (student response system)!
That is worth trying out for me! I have a loaner set I will use this Fall with my Algebra classes.
It is a bit bulky, but the case charges the calculators and allows me to send data to all of the calculators at once (if I don’t have the yellow Navigator caps on. The case will not close with the Navigator caps on).
The calculator has a color screen, along with a mouse track pad and a full keyboard on the bottom. Lots of handy math symbols are easy to get to directly from the keys as well. (The calculator shown does NOT have the yellow Navigator cap on.) But let’s get down to how to use this with the Navigator system!
I downloaded theTI-Nspire Navigator teacher software from their website and then set up a sample class with 5 students. As you can see below, I named them Student 1, Student 2, Student 3, Student 4 and Student 5 (I am so creative!). You will create usernames for each student and then either create a password for them, or let them create their own. You can also upload a CSV file into the system to automatically populate your class!
I am using the TI wireless network access point (it looks like a Verizon MiFi) to connect all the calculators to my computer, but you only have to set that up one time. Once you “Begin Class” (top right of the image above), then the students can log into ANY of the calculators (they don’t have to have the same one each time!) and make sure they are connected to the network you created. It will tell them they are logged in, and they will show up on the teacher’s computer that way as well.
There are 2 main features I plan to use the calculators with the Navigator system for: 1. grabbing screen shots of all (or some) student calculators, and 2: polling the students – asking them a question like using a clicker, but the question shows up on their calculator with the tools they need!
CALCULATOR SCREEN SHOTS
At any time during the class, I can grab live screen shots of all student calculators, or just one student’s calculator. I think this will be very handy to “check in” on student progress to see where they are in solving the problem given or to see if they are even paying attention!
I can even “call on a student” to share their screen to see how they solved a problem (by making them the presenter).
POLLING STUDENTS
The 2nd, and main use, of the Navigator system with the TI-nspire calculators for me is using them to “poll students” during class.
I was really amazed to see the variety of questions I can create and send to the students’ calculators! Other clickers (student response systems) I have tried have a few of these options, but this is truly an incredible list for math!
In the above screen I chose the “Drop points” type of question, and typed in my question (see below).
I have a lot of math templates I can choose from as well, if I need to quickly type in a fraction or other math symbol.
I created a question for the students to drop a point on the graph where the ordered pair (3,-4) is located. That would not be possible on any other clicker I know of! To send the question to the calculators I just hit the “Start Poll” button at the top of the screen. I can create questions ahead of time, or real time during class, to poll the students with.
The photo above shows what was sent to the calculators. As you can see they have a split screen with the question and a set of axes to plot their point on. The students use the track pad on their calculator to move the point to the desired location.
Once they have answered the question, they hit the “Doc” key and choose “submit” (they are submitting their document to my computer). The teacher’s computer then shows that student has responded.
The teacher can hit “Stop Poll” at any time to stop the students from being able to answer the question any longer, and gather all the data. The data is stored on the computer and the teacher can access it immediately, or look through individual student responses outside of class.
The system allows the teacher to set up questions where students can show steps, and the teacher can show multiple pieces of information in the question, like the question and a graph as seen below.
When the students submit their solution, the work is shown as you can see below (different question I was playing with).
The teacher can also look at the solutions of the class as a whole (another different question):
The question is always shown with the solutions given by the students., but this view is nice for the students to be able to see (anonymously) what the different answers looked like from the class.
If the teacher creates the question with a “correct answer”, then the solutions the students submit will be scored as correct or not (the teacher can even give more than one correct answer!).
I realize this is a lot of information at once, but I was hoping that some of you would be as excited as I am about using the TI-nspire CX with the TI Navigator system as a student response system (clickers) in class!
I will write more after I start using it in my Algebra classes and let you know how it is going.
I got back from ISTE, overwhelmed with all the new and amazing tools and apps I learned about! Luckily the great folks at Doceri let me play with their beta 2.0 version (which should hit iTunes stores soon) and that made for an easy decision for me to start right there.
I get to use the iPad classroom (25 student iPads, 1 teacher iPad, and an Apple TV!!) to teach Intermediate Algebra in the Fall, so my focus at ISTE was to find iPad apps that allow students to create, not just to consume. I hit the jackpot with the new version of Doceri!! Not only can I create lessons, but the students will be able to create animations and videos as well, right from their iPads.
The new version of Doceri (2.0) should hit the iTunes app store soon, and it is a HUGE update!
The new features I am so excited about are 1) it allows you to work directly from the iPad (without needing to connect to a computer), and 2) it now records your pen strokes allowing you to easily create animations and videos directly from the iPad! INCREDIBLE! You can even edit your animations and upload your videos to YouTube!
OK, before I get too far ahead of myself (I am just so excited!), here is the new opening screen on the iPad:
(By the way, I did get permission from Doceri to blog about the new version before it hits the iTunes store!)
**UPDATE! Doceri 2.0 will be in iTunes stores July 24, 2012!!!
As you can see, Doceri 2.0 can now be used from the iPad alone, and even use Airplay if you are presenting (or just use the iPad at home to create a lesson!!!).
Starting a new project gives you a blank screen, which you can change to any color, use one of their backgrounds, or create your own. They have included many helpful math backgrounds, along with maps, as well as colors and textures.
After you choose your background, you can start writing on the screen. What you see at the top of the image below is the new RECORDING menu!!! It records your writing strokes. You can go back and edit them, speed them up, or slow them down. You can even add stops and new slides to your project. The record button on the top left allows you to record voice as well (while writing, or narrate even after you are done writing).
After recording a video, you have several options for exporting (on the right) to Facebook, YouTube, email, and to your images folder on the iPad.
You can also open your recordings on your iPad with any app loaded that will play a .mov file, including Dropbox and Evernote, so you can access your recordings from any device! (I also have TechSmith’s Fuse app installed on my iPad, so it found that app and listed it as well.)
The folks at Doceri created quite a few sample projects to help give ideas on how this new product can be used. Here is a screenshot of one of their videos (of course I chose math, but there are many other types as well):
*Once Doceri 2.0 hits the iTunes stores, you can pay for the ability to remove the Doceri watermark, and even add your own watermark.
Like the original Doceri Remote app, Doceri 2.0 can connect to your computer to share screens, but now there is a MUCH easier way to connect:
If you have an iPad2, just point the camera at the QR code and you are automatically connected! I tried it and it worked amazingly well. Once you are connected to your computer, you can use your animations and videos to present a lesson to the class, or create one while you are presenting!
**I am using the term “animation” for those projects that do not contain sound. All writing into the application is recorded and can be shown as animated or as still shots. These can only be played from within Doceri. Once you add sound, then a .mov file is created, so I am using the term “video” for the animations with sound added.
Here is the “official” list of updates for Doceri 2.0 (from Doceri):
What’s new in Doceri 2.0
You can now prepare Doceri Projects on the iPad without being connected to a Doceri Desktop AND you can present without a Doceri Desktop via Airplay. Audio recording has been added to create high quality screencast videos based on Doceri projects. In addition, more sophisticated drawing and authoring tools have been added, as well visual file management, improved placement of project timeline controls for easier presentation, and improved screen update time for remote desktop control.
Screencasting with Doceri
Create a live screencast as you present, or create, edit and perfect your project in advance and add an audio voice over later
Choose to save audio or delete and re-record without impacting your Doceri project
Videos may be shared via YouTube, Facebook or email and/or saved to the Camera Roll and any app that responds to video
New Drawing and Authoring Tools
New line tools (with snapping), geometric shapes (rectangle, ellipse) arrow tool and a new pen tool with realistic ink flow
Easy access to six user-defined favorites from the available drawing tools
Place photos from Camera Roll, Photo Stream or another application at any point in your project
The new lasso tool allows you to cut, copy, move and paste drawing objects
Choose between patterns, colors or create custom backgrounds on any slide in your project
Direct Controls for Keynote and Powerpoint
Launch a PowerPoint or Keynote presentation and use Doceri’s one-touch controls to advance your slides
Annotate over Keynote or Powerpoint (or anything shown on your desktop), creating a multipage Doceri project while keeping your original presentation file intact
Completely Revamped File Management
Doceri files can now be stored on the iPad Duplicate, merge projects, and transfer to and from your desktop
Combine, resize and share screencasts to Facebook, YouTube, Camera Roll or email with a simple drag and drop
Full implementation of cross application file sharing allowing “open in” function to copy files in and out of Doceri
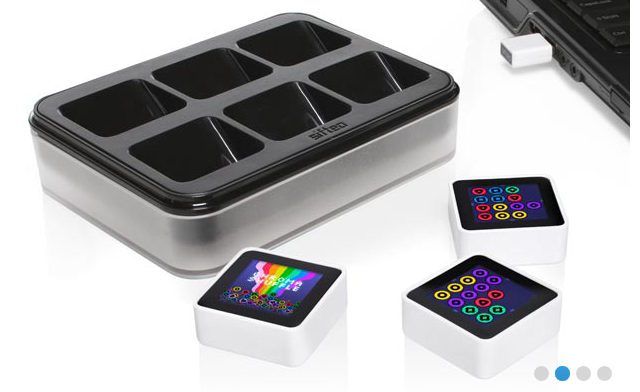
I came across an article a few weeks back on some amazing new technology for games and educational apps called Sifteo Cubes.
*image taken from the Sifteo website
I could see potential without even touching them! I ordered a set (they come with three cubes) and they came right away. Within the first day I knew I had to have all six cubes, so I ordered a second to get down to the business of seeing what the full set could really do.
Right now there are not a lot of apps for the cubes, but anyone can download the Sifteo SDK and create their own apps for the cubes. I think I have found a couple game programmers who are willing to work towards creating some educational apps that I have in mind to reinforce fractions and algebra concepts. These cubes will be really amazing for math!
I created a short video of some of my favorite apps so you can see how the cubes work.
If you decide to get a set, please write me and let me know how you plan on using them.
I have heard from several people that they would like to see some of the educational videos I have created. I realize there was a pull down menu at the top of my blog for it, but I never actually organized the content I have created in the past.
In the past 6 months I have had to wipe both my Mac and my Windows machine (long stories), so some of my videos are now “lost’, but luckily YouTube still has a small collection.
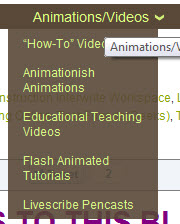
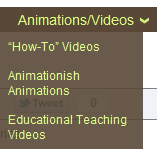
I finally got organized today and separated my videos into categories. If you look along the top of my blog, you will see a category called “Animations/Videos” :
Most of my videos fall in to four categories of “How-To” videos, “Educational Teaching Videos”, “Flash Animated Tutorials”, and “Livescribe pencasts”. I will be adding some Animationish videos after this Fall when I have my students creating some.
I created the “How-To” videos to teach others how to use software or hardware. Here are the categories I have in that section:
I plan on adding more videos to this section in the near future, so some of the categories do not have any links yet.
The next main category I have been creating videos for is in “Educational Teaching Videos”. These are short videos I have created for my students to introduce a topic we are studying in the class.
As you can see when you look through the Educational Teaching videos, I was trying out several types of hardware/software to see what worked best. I used the eInstruction Workspace software for a “whiteboard” in some videos, and recorded and edited with Camtasia studio. In other videos I used a Lumens HD Ladibug document camera. I found the document camera to be better for me when I am actually needing to record working with actual objects like base ten blocks and fraction circles. I will hopefully be making more videos using these this semester. I will try to keep up with posting them here so I don’t lose them again!!
Most of the tutorials/lessons I have created for my students in the past year are Livescribe pencasts, but I find when I need the lesson to be more visual, a video is better. My livescribe pencasts are organized by topic on THIS PAGE. I have quite a few pencasts collected there. When I had to wipe my computers, I lost all the original pencasts, so for now I cannot change any of those pencasts into PDF’s to download.
Lastly, about six years ago I started created Flash animated tutorials to help my students in my Math For Elementary Teachers classes better visualize the math they will be teaching. I strongly believe visualization is key to understanding!
The Flash animated tutorials are housed on a separate area (outside of my blog). They are organized by arithmetic topic:
For example, clicking on the “1/3” would take you to the fraction tutorials, and the “2” will take you to the multidigit whole number operations. This type of tutorial takes me a lot longer to create, so I do not have many in some areas (like decimals). Instead, I am starting to create more interactive tutorials using Hyperstudio. To see a few of those interactive tutorials, CLICK HERE.
These are still a work in progress, but I promise to continue adding here so check back!
I have been sitting here staring at my computer for the past week since I got back from an amazing time with a room full of extremely innovative teachers in San Francisco as part of the Livescribe Educational Advisory Board.
I keep staring at it not being able to decide where to start! I have so many new ideas that I want to implement for the Fall, and now I have even more resourceful people to guide me when I get stuck!
Some of the big ones on my list I have already started working with, but I want to dig deeper and create projects for my students to interact with, and also projects for them to create:
I have been playing with WolframAlpha for the past year, but I recently purchased Mathematica and I am excited to see what I can create with it! My goal is to create visual and interactive materials for Algebra and Geometry. I will post as soon as I start building! I am still watching the video tutorials for now. I want to look further into the following links as well:
Lastly, I NEED to learn Photoshop. My oldest son currently creates all of my artwork for my projects, but in a few years he will be off to college and won’t be around to help me!
Hopefully between spending time with my family and attending ISTE and HI-TEC this summer, I will be able to dig deeper and create some projects for next Fall using some of these great interactive applications!
I was so excited to see a new window show up when I upgraded to Windows 7…it is called the Math Input Panel. With a name like that I had to be excited before even trying it out!
I immediately started playing with it and was surprised and VERY happy to see how easy it was to handwrite math and have it insert the typed version into my Word document! It does not always pick the correct letter or number, but you can easily edit an individual symbol.
I have tried writing some algebra, and it does a great job with that as well!
I am excited to see more tools for my students to be able to use to ‘write” math on their computers as well. Although Word comes with Equation Editor, my students do not know how to use it. Now, students can easily handwrite their math problems and have them typed up!
For students with disabilities – or anyone who wants to have the math read out loud to them, Word can then take the file that has the math equations embedded and be saved as a MathXL document. MathPlayer should then be able to read the math out loud….I will try that next and see how it works out!
In my spare time (ha ha) I have been playing with Roger Wagner’s Hyperstudio 5. (Luckily Roger Wagner himself has been helping me!!) What a fun program! My goal is to create more INTERACTIVE activities and tutorials/videos for my students, without all the work of Flash. Hyperstudio fits that goal amazingly well! It is similar to PowerPoint, but far more incredible in my book!
I “finished” my first final draft (I keep “fixing it” so it is forever in draft mode) of an interactive tutorial on introducing combinations and counting, and posted the project on a new area of my website with the button “HyperStudio Projects”.
Before clicking on the link below that will take you to the Hyperstudio stack, you must first make sure you are using either Safari or Internet Explorer, because these are the only browsers that have the Hyperstudio web-brower add-on for now. To get the browser add-on, go to: http://www.mackiev.com/support_hs.html , click on the proper computer type, then get the browser add-in for either Safari or Internet Explorer, then you will be able to view and PLAY WITH the activity.
If you have the browser add-on correctly installed you should see the following screen:
Once the stack is finished loading, the screen should look like:
Now you are ready to click on “go to STORY”.
I created the story like a video, and I narrated every screen, so you can hear the narration if you click on the button. The audio level needs some work, some of the narration is too quiet and I will need to redo those sections. The most fun part of it, however, is the INTERACTIVITY that was easy to create!
In this activity, I created an Ice Cream Playground, where you can actually move around all the objects on the page to explore and find the answer before viewing the explanation of the solution. My 14 year old son did all of the artwork for me! It is wonderful having a live-in artist on hand!
Please give it a try and let me know what I can do to make it more interesting for my students. I also need to know if you are able to view it on a Mac and on a Windows machine. Some Windows machines can view it and some cannot, so I am trying to trouble-shoot which versions of Windows have difficulty to help find a fix for that.
I am excited to make more projects and play with Hyperstudio!
I have started on a quest to make math more accessible! I recently purchased Dragon NaturallySpeaking, Premium ver 11.0. It just came today and I have been playing with it to train it to trancribe my voice. So far it has done a great job in Word, but then I decided to have it transcribe the audio file from the Livescribe pencast below.
When the pencast is still on your desktop, you can export the audio separately. I then imported the audio file directly into Dragon and the original transcipt is shown below (I just cropped a small part of the transcript for you to see). I still have a lot of “training” on Dragon to do, but it didn’t do a bad job for the first try! It certainly has potential to help create a transcript for my pencasts for students who need one.
(click on the image to see a larger version of the text)
Livescribe also has transcription software you can purchase called “MyScript”. Here is a link to the software. It has some difficulty transcribing the math, but here is the first pass it made:
(click on the image to see a larger version of the text)
I have a student in one of my classes that loves learning with technology. He is always asking me what software and hardware I am using. The other day I turned the tables on him and became very interested in the applications he was using on his iPad to take notes in my Algebra class. He said he was using SmartNote. I have tried several note taking apps on my iPad, but I have not tried that one …yet!
I decided I would start a blog series comparing several of the note taking applications that I have tried on my iPad, along with trying out a few more that have been recommended by others.
In these articles I will focus on applications that allow students (and anyone) to take hand-written notes with a pen, such as the Pogo Sketch (that is what I use).
The first app I started using is called Sundry Notes . There is a free version available in the iTunes store, as well as a paid version that does not have any ads.
I was immediately impressed with the fact that Sundry notes has its own calculator built in, along with several menus of math symbols you can add to any note! In the screenshot below you can see I was able to start graphing, post a calculator, a table, and handwrite, all on the same page! The app will also allow you to post an audio note and embed photos as well!
The notes are fairly easy to organize and you have several “views” to choose from. Below you can see the “preview” mode, where you can see what is written on any note in any stack of notes.
You can also place notes in a stack, which would be the same as placing them in the same folder or notebook. In this view you can see the different stacks of notes you have created.
The main drawback that keeps me from using Sundry Notes all of the time is that the pages of notes are very small, so if you know you want to take lot of notes, you will be creating a lot of pages! After writing on the page, you can shrink down the writing, but it is a bit cumbersome if you are quickly taking notes for a class.
Next time I will review Penultimate, which is another app I found soon after getting my iPad.


