Can I just start with “WOW”!?!
I got back from ISTE, overwhelmed with all the new and amazing tools and apps I learned about! Luckily the great folks at Doceri let me play with their beta 2.0 version (which should hit iTunes stores soon) and that made for an easy decision for me to start right there.
I get to use the iPad classroom (25 student iPads, 1 teacher iPad, and an Apple TV!!) to teach Intermediate Algebra in the Fall, so my focus at ISTE was to find iPad apps that allow students to create, not just to consume. I hit the jackpot with the new version of Doceri!! Not only can I create lessons, but the students will be able to create animations and videos as well, right from their iPads.
Here is a quick video I made using Doceri 2.0:
Link to the video on YouTube
The new version of Doceri (2.0) should hit the iTunes app store soon, and it is a HUGE update!
The new features I am so excited about are 1) it allows you to work directly from the iPad (without needing to connect to a computer), and 2) it now records your pen strokes allowing you to easily create animations and videos directly from the iPad! INCREDIBLE! You can even edit your animations and upload your videos to YouTube!
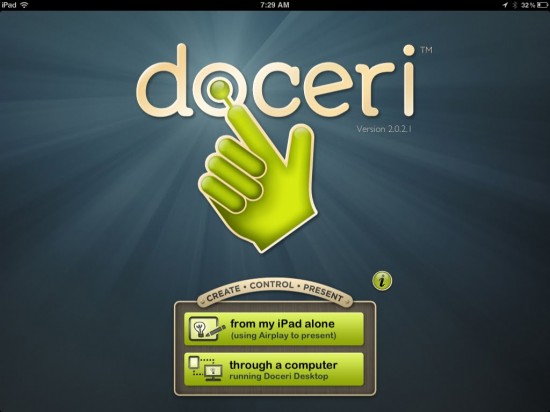
OK, before I get too far ahead of myself (I am just so excited!), here is the new opening screen on the iPad:
(By the way, I did get permission from Doceri to blog about the new version before it hits the iTunes store!)
**UPDATE! Doceri 2.0 will be in iTunes stores July 24, 2012!!!
As you can see, Doceri 2.0 can now be used from the iPad alone, and even use Airplay if you are presenting (or just use the iPad at home to create a lesson!!!).
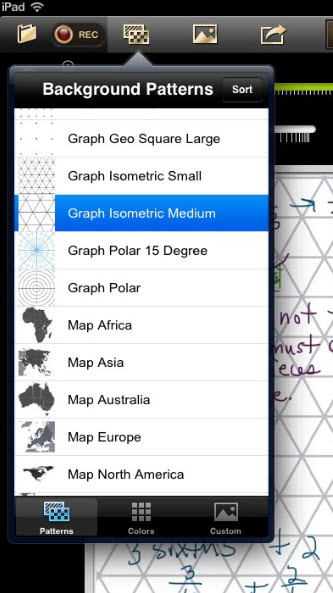
Starting a new project gives you a blank screen, which you can change to any color, use one of their backgrounds, or create your own. They have included many helpful math backgrounds, along with maps, as well as colors and textures.
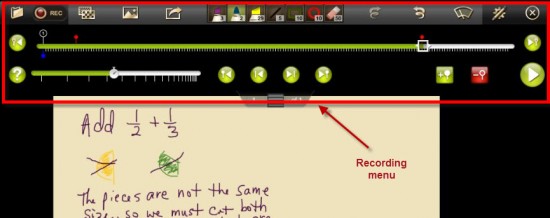
After you choose your background, you can start writing on the screen. What you see at the top of the image below is the new RECORDING menu!!! It records your writing strokes. You can go back and edit them, speed them up, or slow them down. You can even add stops and new slides to your project. The record button on the top left allows you to record voice as well (while writing, or narrate even after you are done writing).
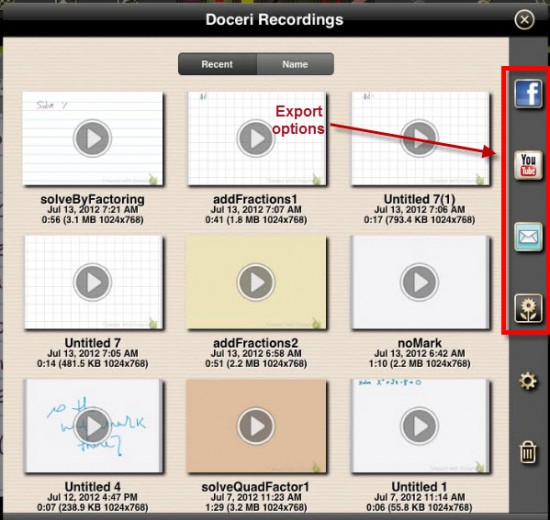
After recording a video, you have several options for exporting (on the right) to Facebook, YouTube, email, and to your images folder on the iPad.
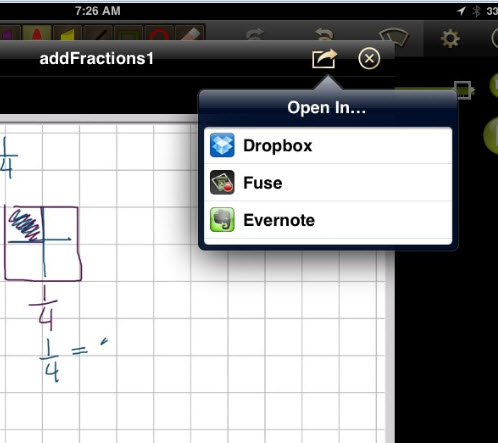
You can also open your recordings on your iPad with any app loaded that will play a .mov file, including Dropbox and Evernote, so you can access your recordings from any device! (I also have TechSmith’s Fuse app installed on my iPad, so it found that app and listed it as well.)
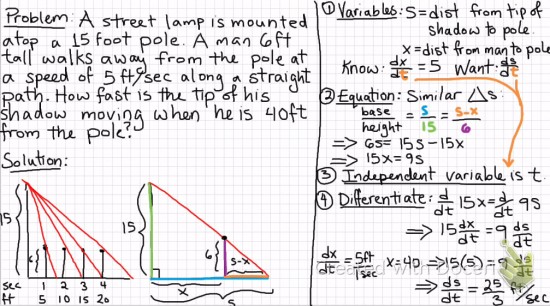
The folks at Doceri created quite a few sample projects to help give ideas on how this new product can be used. Here is a screenshot of one of their videos (of course I chose math, but there are many other types as well):
*Once Doceri 2.0 hits the iTunes stores, you can pay for the ability to remove the Doceri watermark, and even add your own watermark.
Here is a link to the video version (I did not add any sound): math 01 – related ratesDoceriSample
Links to 2 more videos I made using Doceri 2.0
Solving Quadratics by Factoring
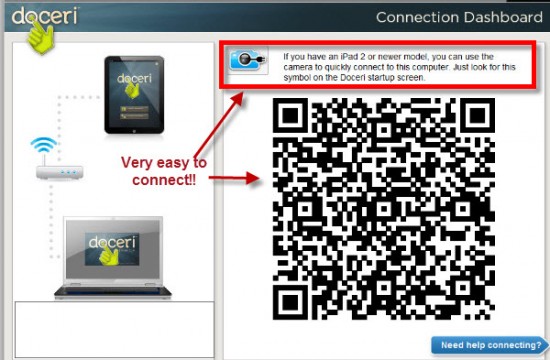
Like the original Doceri Remote app, Doceri 2.0 can connect to your computer to share screens, but now there is a MUCH easier way to connect:
If you have an iPad2, just point the camera at the QR code and you are automatically connected! I tried it and it worked amazingly well. Once you are connected to your computer, you can use your animations and videos to present a lesson to the class, or create one while you are presenting!
**I am using the term “animation” for those projects that do not contain sound. All writing into the application is recorded and can be shown as animated or as still shots. These can only be played from within Doceri. Once you add sound, then a .mov file is created, so I am using the term “video” for the animations with sound added.
Here is the “official” list of updates for Doceri 2.0 (from Doceri):
What’s new in Doceri 2.0
You can now prepare Doceri Projects on the iPad without being connected to a Doceri Desktop AND you can present without a Doceri Desktop via Airplay. Audio recording has been added to create high quality screencast videos based on Doceri projects. In addition, more sophisticated drawing and authoring tools have been added, as well visual file management, improved placement of project timeline controls for easier presentation, and improved screen update time for remote desktop control.
Screencasting with Doceri
- Create a live screencast as you present, or create, edit and perfect your project in advance and add an audio voice over later
- Choose to save audio or delete and re-record without impacting your Doceri project
- Videos may be shared via YouTube, Facebook or email and/or saved to the Camera Roll and any app that responds to video
New Drawing and Authoring Tools
- New line tools (with snapping), geometric shapes (rectangle, ellipse) arrow tool and a new pen tool with realistic ink flow
- Easy access to six user-defined favorites from the available drawing tools
- Place photos from Camera Roll, Photo Stream or another application at any point in your project
- The new lasso tool allows you to cut, copy, move and paste drawing objects
- Choose between patterns, colors or create custom backgrounds on any slide in your project
Direct Controls for Keynote and Powerpoint
- Launch a PowerPoint or Keynote presentation and use Doceri’s one-touch controls to advance your slides
- Annotate over Keynote or Powerpoint (or anything shown on your desktop), creating a multipage Doceri project while keeping your original presentation file intact
Completely Revamped File Management
- Doceri files can now be stored on the iPad Duplicate, merge projects, and transfer to and from your desktop
- Combine, resize and share screencasts to Facebook, YouTube, Camera Roll or email with a simple drag and drop
- Full implementation of cross application file sharing allowing “open in” function to copy files in and out of Doceri

