It has been over 2 years now since I retired from teaching. I taught math for 29 years with a passion for utilizing the newest and most effective technology. I bought most of the technology I used in my classrooms (and outside of them) with my own money so I could always be on the forefront, and could use it every day in my classes. Waiting until my college or district could check out the technology, then approve it for me, took too long for my taste. I actually had a side job to earn money just for this purpose!
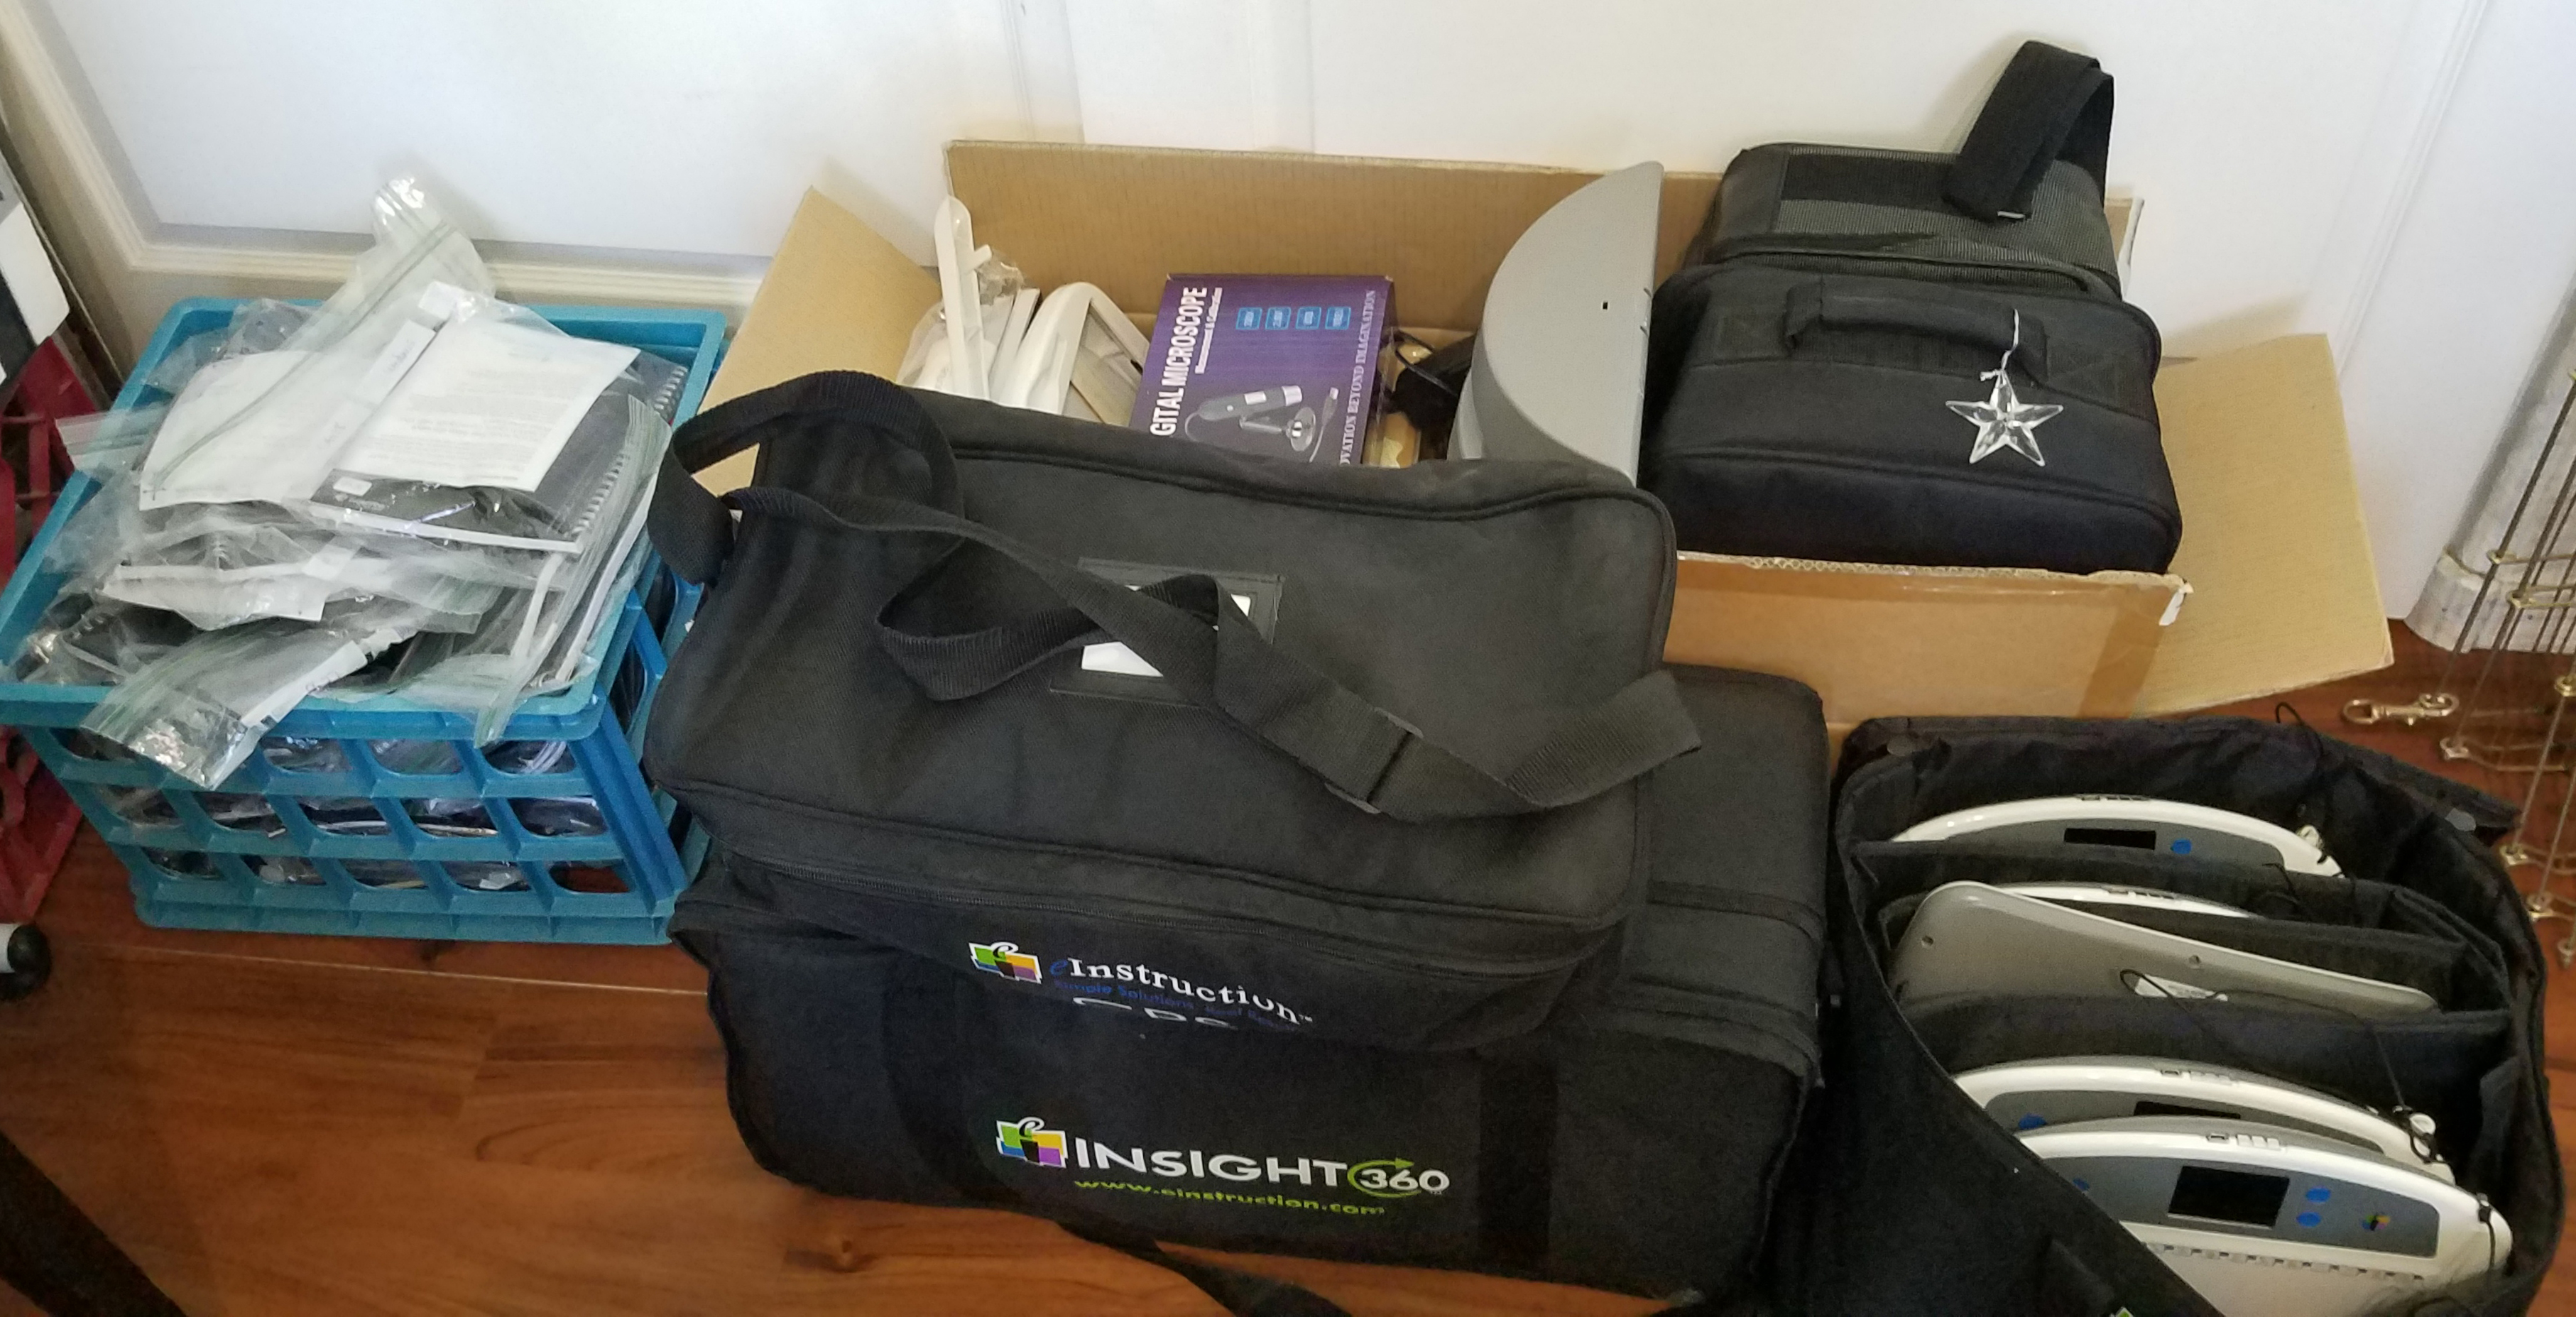
Well, my home office is now FULL of that technology. All of it is in excellent condition, but most of it is not getting used, which is quite sad! I now do a lot of consulting from my home office, so I use some of it, but the items that were perfect for inside the classroom are just sitting around collecting dust. I have decided it is time to “clean house” and try to get those items into the hands of folks who will use them again. *Update – I donated many of the items shown here to two of my children’s previous teachers.
For many years I was an avid user of eInstruction’s mobile interactive white boards – MOBIs (and I still am). I have a classroom set of 6 Mobis that my students would use to share their group work with the class from. While they are not brand new, they are still in great condition. The students really enjoyed being able to participate from their desks. I placed a color tab on the edge so I could refer to a group by color. The photo above shows the “purple” Mobi. Many students admitted that they preferred being able to participate from their desk and not have to go to the board. The screen I was projecting their work to could be split up so I was able to show one group’s work, or all 6 at once.
These Mobis can also be used to teach from, as well. I disliked being stuck at the front of the classroom at the board, so instead, I would connect a MOBI to the my computer and then I was free to teach from anywhere in the room. This was especially helpful when students were in groups, as I could walk around helping and also writing something helpful for all students on the projected board from anywhere.
I did prefer to use an eInstruction MOBIVIEW to teach from, instead.
The main difference between the learner MOBI and the MOBIVIEW is that the MOBIVIEW has a large touchscreen that can be used to run student clickers as well as their learner MOBIs.
As many of you know, I retired from teaching full time in May 2015. Since then I have started a new business.
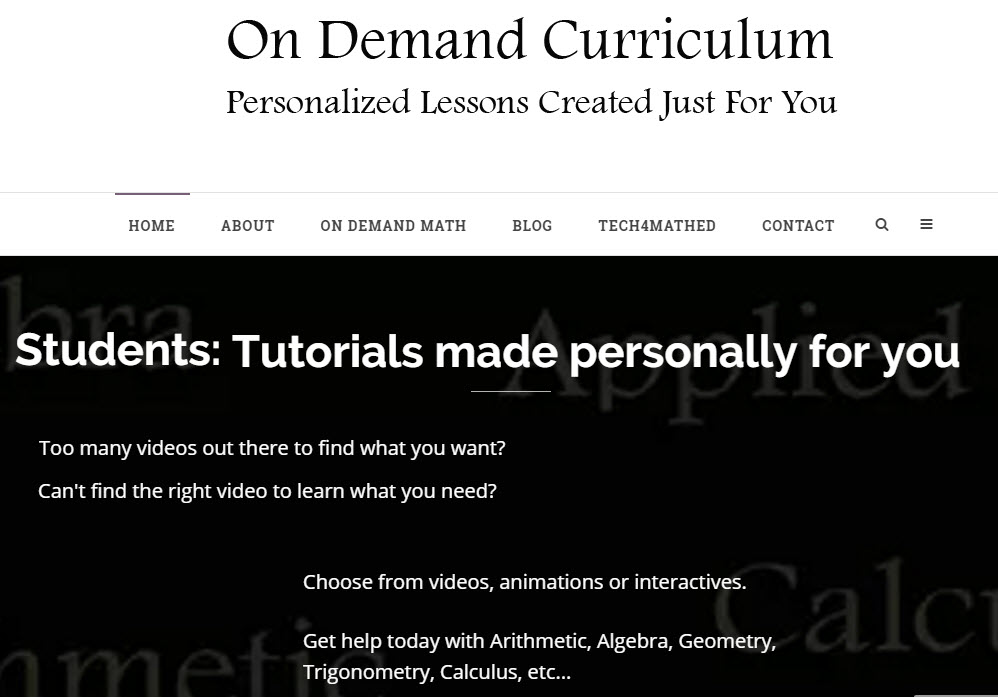
The business is on my own and related to teaching. At www.ondemandcurriculum.com my mission is to help students, teachers, parents, and anyone needing help in math, by creating a personalized video or interactive to help them understand the concept in a manner that is best suited to their learning style. I also have been creating digital media to enhance ebooks for major textbook companies. This also fits my mission of helping students understand and visualize math concepts.
In closing, I want to stress that retirement does not mean staying home and doing nothing for me, but instead it gives me the opportunity to focus on things that I have a passion for: helping others through digital media creation, sailing, introducing others to sailing, and just having fun on the water with family and friends!
I recently wrote about the video series I created for Pearson, entitled Common Core in Action. I wanted to share one more screen shot from the videos and talk a little bit more about what using Hyperstudio can do to make videos more engaging and visually appealing for students.
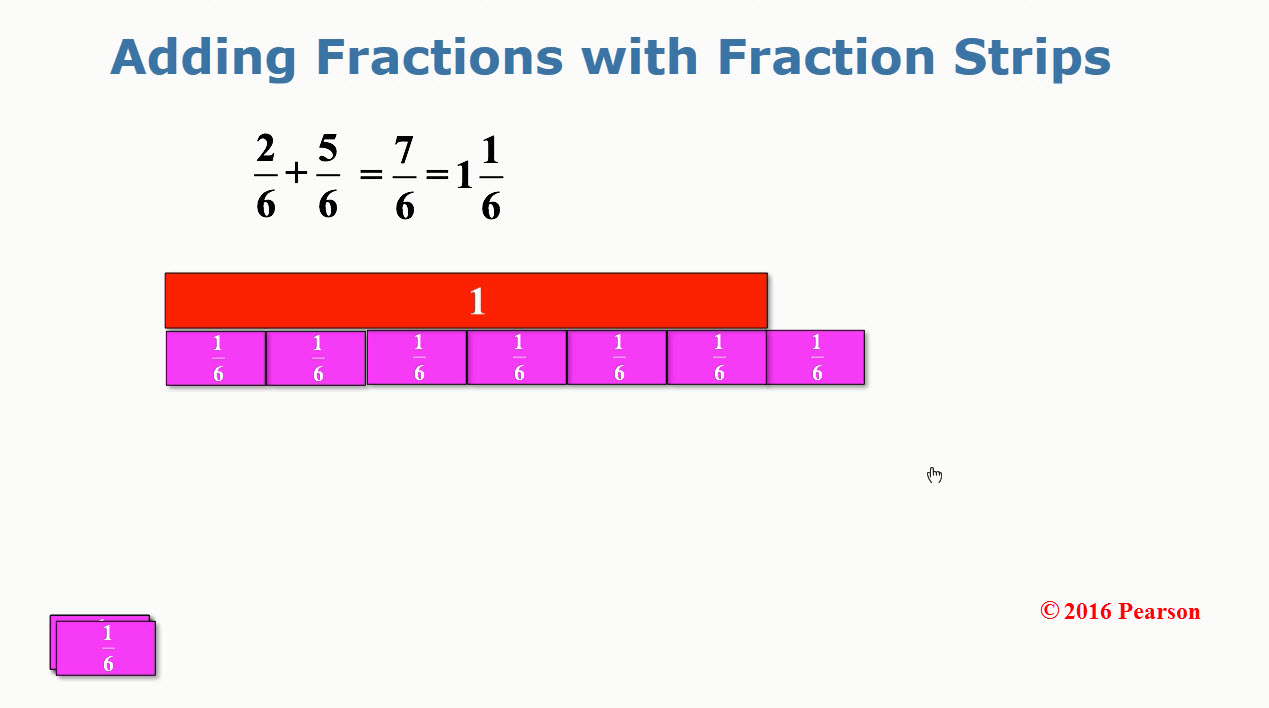
Here is a screen shot from the video entitled “Common Core In Action: Adding Fractions”.
The screenshot above is showing the portion of the video where I am adding two fractions with a common denominator of sixths. The sixths are visually represented by purple one-sixth fraction strips.
I used Hyperstudio to create the stage for my video because I can move objects around the stage during the video. In this case, I used the stack of one-sixth strips on the bottom of the screen to show two-sixths plus five-sixths as adding a set of 2 purple one-sixth strips and 5 more purple one-sixth strips to obtain 7 of the purple one-sixth strips.
The point in the video where this screenshot is taken, is where I am showing how the improper fraction seven-sixths, can be turned into a mixed number by bringing a red strip to the stage, which is worth one whole. Lining up the purple one-sixth strips along the edge of the red one-whole strip, I am able to show that 6 of the one-sixth strips are equal in length to the one-whole red strip, leaving me with 1 one-sixth strip left over. Having the ability to move around the fraction strips during the video makes it easier to explain visually why seven-sixths is the same as one and one-sixth.
Using the fraction strips is important to the Common Core Standards for explaining WHY a common denominator is needed when adding fractions, and not just having the student perform an algorithm by showing them “how” to add fractions.
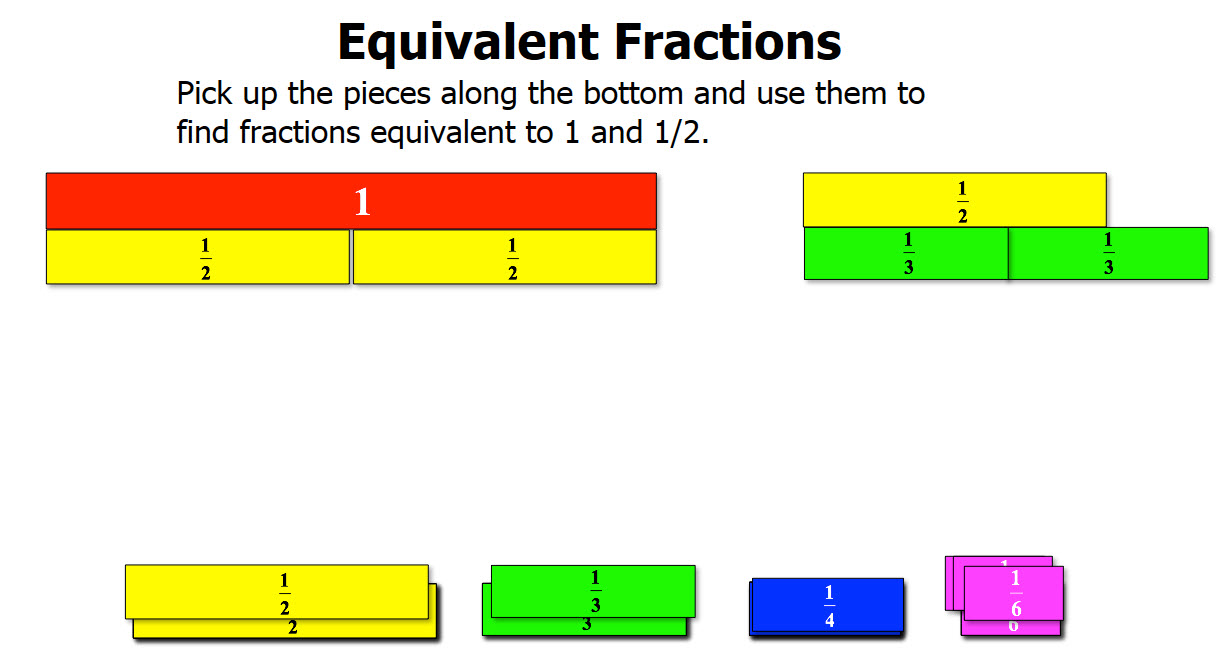
To give you a better idea of what the fraction strips can do for students when I use them in fraction lesson videos, I created a small video where I move around the fraction strips showing how to visualize equivalent fractions. You can see that HERE.
In the screen shot above, I have created all of my fraction strips so that they are relative in size to the red one-whole strip. For example, it takes 2 of the one-half strips to equal the one-whole strip, 3 of the one-third strips, 4 of the one-fourth strips, and 6 of the one-sixth strips. Another reason I use Hyperstudio, rather than real fraction strips and a document camera to create the videos I teach with, is because I can create any size and color fraction strips I want.
If you would like me to create a lesson for you, please send me details about the manipulatives (like fraction strips) you would like me to use, along with desired colors, and I will design and create a personalized video lesson for you, on demand!
I wanted to share a blog post I wrote for my new business, On Demand Curriculum (www.ondemandcurriculum.com). Normally, I don’t plan on posting the same content on both sites, but this one seemed appropriate here, since I am talking about the technology I used to create the Common Core in Action videos.
I recently finished designing and creating a set of professional videos for Pearson Higher Education called “Common Core In Action”. It was such a fun project! The videos are going to be used with math content texts for college students studying to be K-8 teachers. This particular set of videos shows how to teach some of the topics in elementary mathematics, to align with the Common Core Standards.
These videos would be a great resource for parents trying to understand their child’s homework, which could utilize many of these methods. Therefore, I am working with Pearson to try to get permission to set up a site where parents could view these valuable resources. Stay tuned!
I was given permission by Pearson to show a couple of screenshots from the videos. I will talk about each screenshot in a separate blog post. The first video screenshot I want to show you is from a video entitled “Common Core in Action: Addition Algorithms”.
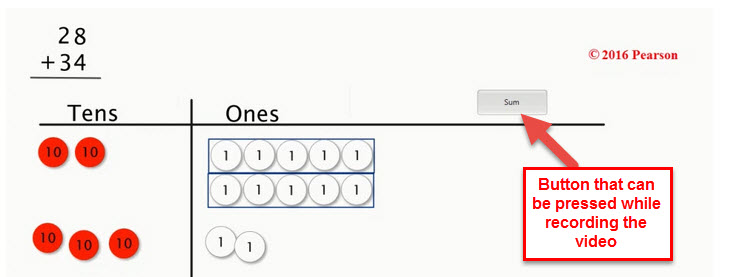
To align to the Common Core State Standards when teaching addition, teachers often have the students use Place Value Disks. In this video I created a set of place value disks, where white disks are worth 1 (one) unit, and red disks are worth 10 (ten) units, to match the actual physical items elementary schools are using. I also included 5-frames and 10-frames to help teach addition involving regrouping, which used to be called “carrying” when I was in elementary school.
I used Hyperstudio to design and build the background to my video because I wanted to be able to interact with the place value disks during the video, as I taught the lesson on adding whole numbers using place value.
In the screenshot of the video, the bottom row is comprised of the movable objects:
I have created multiple copies of each object, sitting on top of one another. During the video I “pick up” place value disks or 5-and 10-frames, as needed, and move them onto the place value board. The eraser on the side of the screen (see the original screen shot) is used when I create subtraction videos, so that I am able to “erase” objects I am removing, or subtracting.
As I talk through the process of adding 28 and 34 in the video using place value disks, I actually move the disks into the appropriate columns in the place value chart shown.
The screen shot shows the point in the video where I have 2 ten disks plus 3 ten disks. I also have 8 one disks plus 4 one disks, but in this screenshot I have already regrouped 10 of the one disks to create a set of 10 ones inside of a 10-frame. This left me with one 10-frame of one disks and 2 one disks left over. The next step in the video would show me trading the 10-frame for 1 ten disk, and moving the ten disk into the “Tens” column. This allows me to explain in arithmetic where the “carried 1” comes from.
When I complete the process, and have the final tens and ones disks in the place value chart, I relate the place value disks to the final numeric representation of the sum by hitting the button on the screen labeled “Sum”. The screen will then show the number 62 (which is later in the video than this screen shot), where the digit 6 represents the 6 red ten disks which will be on the screen and the digit 2 represents the 2 white one disks that will be left on the screen.
If you would like me to create a video showing how to use classroom manipulatives to teach a topic in your curriculum, please contact me at sue@ondemandcurriculum.com, and I would love to work with you!
I got back from ISTE, overwhelmed with all the new and amazing tools and apps I learned about! Luckily the great folks at Doceri let me play with their beta 2.0 version (which should hit iTunes stores soon) and that made for an easy decision for me to start right there.
I get to use the iPad classroom (25 student iPads, 1 teacher iPad, and an Apple TV!!) to teach Intermediate Algebra in the Fall, so my focus at ISTE was to find iPad apps that allow students to create, not just to consume. I hit the jackpot with the new version of Doceri!! Not only can I create lessons, but the students will be able to create animations and videos as well, right from their iPads.
The new version of Doceri (2.0) should hit the iTunes app store soon, and it is a HUGE update!
The new features I am so excited about are 1) it allows you to work directly from the iPad (without needing to connect to a computer), and 2) it now records your pen strokes allowing you to easily create animations and videos directly from the iPad! INCREDIBLE! You can even edit your animations and upload your videos to YouTube!
OK, before I get too far ahead of myself (I am just so excited!), here is the new opening screen on the iPad:
(By the way, I did get permission from Doceri to blog about the new version before it hits the iTunes store!)
**UPDATE! Doceri 2.0 will be in iTunes stores July 24, 2012!!!
As you can see, Doceri 2.0 can now be used from the iPad alone, and even use Airplay if you are presenting (or just use the iPad at home to create a lesson!!!).
Starting a new project gives you a blank screen, which you can change to any color, use one of their backgrounds, or create your own. They have included many helpful math backgrounds, along with maps, as well as colors and textures.
After you choose your background, you can start writing on the screen. What you see at the top of the image below is the new RECORDING menu!!! It records your writing strokes. You can go back and edit them, speed them up, or slow them down. You can even add stops and new slides to your project. The record button on the top left allows you to record voice as well (while writing, or narrate even after you are done writing).
After recording a video, you have several options for exporting (on the right) to Facebook, YouTube, email, and to your images folder on the iPad.
You can also open your recordings on your iPad with any app loaded that will play a .mov file, including Dropbox and Evernote, so you can access your recordings from any device! (I also have TechSmith’s Fuse app installed on my iPad, so it found that app and listed it as well.)
The folks at Doceri created quite a few sample projects to help give ideas on how this new product can be used. Here is a screenshot of one of their videos (of course I chose math, but there are many other types as well):
*Once Doceri 2.0 hits the iTunes stores, you can pay for the ability to remove the Doceri watermark, and even add your own watermark.
Like the original Doceri Remote app, Doceri 2.0 can connect to your computer to share screens, but now there is a MUCH easier way to connect:
If you have an iPad2, just point the camera at the QR code and you are automatically connected! I tried it and it worked amazingly well. Once you are connected to your computer, you can use your animations and videos to present a lesson to the class, or create one while you are presenting!
**I am using the term “animation” for those projects that do not contain sound. All writing into the application is recorded and can be shown as animated or as still shots. These can only be played from within Doceri. Once you add sound, then a .mov file is created, so I am using the term “video” for the animations with sound added.
Here is the “official” list of updates for Doceri 2.0 (from Doceri):
What’s new in Doceri 2.0
You can now prepare Doceri Projects on the iPad without being connected to a Doceri Desktop AND you can present without a Doceri Desktop via Airplay. Audio recording has been added to create high quality screencast videos based on Doceri projects. In addition, more sophisticated drawing and authoring tools have been added, as well visual file management, improved placement of project timeline controls for easier presentation, and improved screen update time for remote desktop control.
Screencasting with Doceri
Create a live screencast as you present, or create, edit and perfect your project in advance and add an audio voice over later
Choose to save audio or delete and re-record without impacting your Doceri project
Videos may be shared via YouTube, Facebook or email and/or saved to the Camera Roll and any app that responds to video
New Drawing and Authoring Tools
New line tools (with snapping), geometric shapes (rectangle, ellipse) arrow tool and a new pen tool with realistic ink flow
Easy access to six user-defined favorites from the available drawing tools
Place photos from Camera Roll, Photo Stream or another application at any point in your project
The new lasso tool allows you to cut, copy, move and paste drawing objects
Choose between patterns, colors or create custom backgrounds on any slide in your project
Direct Controls for Keynote and Powerpoint
Launch a PowerPoint or Keynote presentation and use Doceri’s one-touch controls to advance your slides
Annotate over Keynote or Powerpoint (or anything shown on your desktop), creating a multipage Doceri project while keeping your original presentation file intact
Completely Revamped File Management
Doceri files can now be stored on the iPad Duplicate, merge projects, and transfer to and from your desktop
Combine, resize and share screencasts to Facebook, YouTube, Camera Roll or email with a simple drag and drop
Full implementation of cross application file sharing allowing “open in” function to copy files in and out of Doceri
A couple months ago I purchased a Livescribe smartpen (click for links within my blog) for my niece to use with her autistic son (I think that makes him my great-nephew?) I showed her how to use it during a family reunion in the Outer Banks over the summer. (Here is a link to the previous article)
Ethan’s mom sent me the following “first impression” of using the Livescribe smartpen with her son, and gave me permission to post it. Her autistic son Ethan is 9 years old:
Every child learns differently. Part of Ethan’s struggle has been that he does not learn by the same standardized methods that most children are able to use for learning. He is great with technology, likes repetitiveness and although he does enjoy social interaction he does not like to “perform” when someone is trying to teach him something. The smart pen allows us to combine and functionally utilize these traits.
Ethan does well with his iPad but unlike the pre-programmed educational apps, with the smart pen we can create our own learning material specific to his needs. For instance if he is struggling with the letter “A” he can sit down with his iPad on his own (in his own space) and replay (over and over) the note session that shows how to write “A” as well as hearing the sound. It also allows me to focus on topics of interest for him. He loves baseball so we can practice spelling and writing sentences all tailored around “Ethan playing baseball.”
The sound stickers are also really cool. We are able to record each page of a book on them so that Ethan is then able to “read” books to himself. He enjoys reading books but at his age most kids are able to read to themselves. This allows Ethan to read/listen to his books independently when I am not available. It also is great in that he is able to repeatedly hear the words in connection with seeing them over and over. ..because let’s face it, as a parent you can only read the same book over and over in one day before you lose your mind.
Ethan’s mom is using the Livescribe smarpen (click to go to the main Livescribe website) to write out the lessons she wants her son to learn, then uploading them to his iPad for him to interact with by hearing and watching the lesson. She is using the sound (dot) stickers to record herself reading each page of his favorite books. She then places a sticker on each page for him to “read” the book by himself. By tapping the sticker with his smartpen, he can hear the words on the page being read to him by his mother!
I will continue keeping updates in this blog on how his first IEP meeting goes this year at school, and how his learning progresses with the use of the Livescribe smartpen.