I had given up on graphing calculators for a while, since I really wanted the students to engage more in class and use clickers. I found the perfect balance recently!
http://education.ti.com/calculators/products/US/home/
The calculators by themselves are pretty amazing, but there is a learning curve that made it too much for me to want to use them with my students. However, I was recently introduced to the TI Navigator system, which turns this amazing calculator into an even more amazing clicker (student response system)!
http://education.ti.com/calculators/products/US/navigator/
That is worth trying out for me! I have a loaner set I will use this Fall with my Algebra classes.
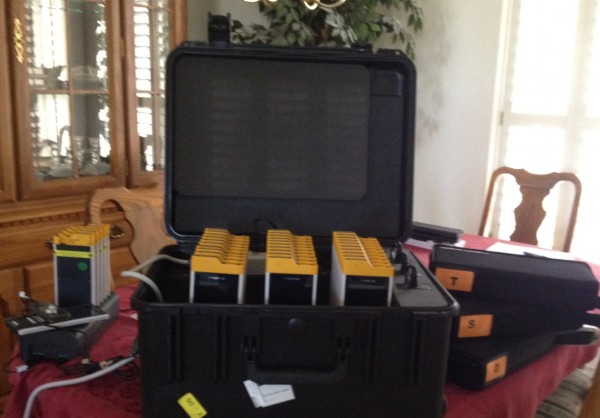
It is a bit bulky, but the case charges the calculators and allows me to send data to all of the calculators at once (if I don’t have the yellow Navigator caps on. The case will not close with the Navigator caps on).
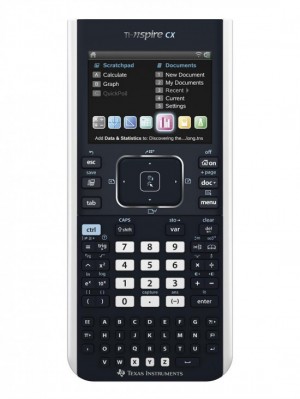
The calculator has a color screen, along with a mouse track pad and a full keyboard on the bottom. Lots of handy math symbols are easy to get to directly from the keys as well. (The calculator shown does NOT have the yellow Navigator cap on.) But let’s get down to how to use this with the Navigator system!
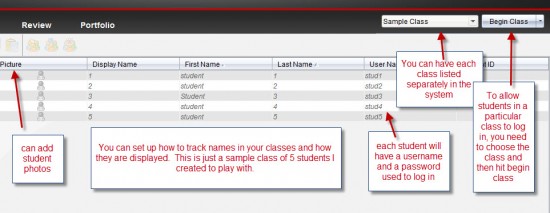
I downloaded theTI-Nspire Navigator teacher software from their website and then set up a sample class with 5 students. As you can see below, I named them Student 1, Student 2, Student 3, Student 4 and Student 5 (I am so creative!). You will create usernames for each student and then either create a password for them, or let them create their own. You can also upload a CSV file into the system to automatically populate your class!
I am using the TI wireless network access point (it looks like a Verizon MiFi) to connect all the calculators to my computer, but you only have to set that up one time. Once you “Begin Class” (top right of the image above), then the students can log into ANY of the calculators (they don’t have to have the same one each time!) and make sure they are connected to the network you created. It will tell them they are logged in, and they will show up on the teacher’s computer that way as well.
There are 2 main features I plan to use the calculators with the Navigator system for: 1. grabbing screen shots of all (or some) student calculators, and 2: polling the students – asking them a question like using a clicker, but the question shows up on their calculator with the tools they need!
CALCULATOR SCREEN SHOTS
At any time during the class, I can grab live screen shots of all student calculators, or just one student’s calculator. I think this will be very handy to “check in” on student progress to see where they are in solving the problem given or to see if they are even paying attention!
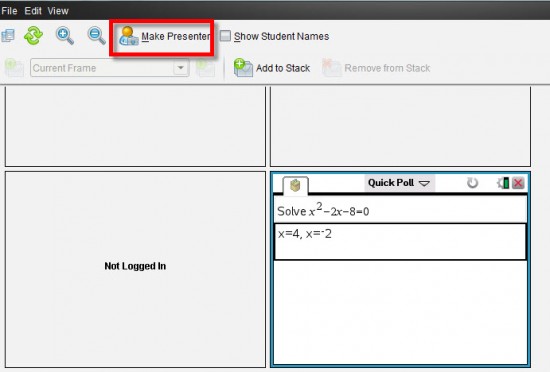
I can even “call on a student” to share their screen to see how they solved a problem (by making them the presenter).
POLLING STUDENTS
The 2nd, and main use, of the Navigator system with the TI-nspire calculators for me is using them to “poll students” during class.
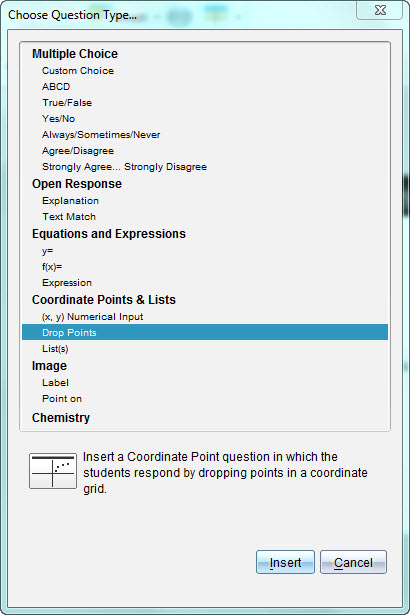
I was really amazed to see the variety of questions I can create and send to the students’ calculators! Other clickers (student response systems) I have tried have a few of these options, but this is truly an incredible list for math!
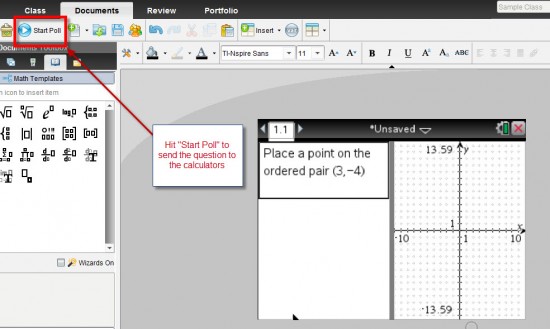
In the above screen I chose the “Drop points” type of question, and typed in my question (see below).
I have a lot of math templates I can choose from as well, if I need to quickly type in a fraction or other math symbol.
I created a question for the students to drop a point on the graph where the ordered pair (3,-4) is located. That would not be possible on any other clicker I know of! To send the question to the calculators I just hit the “Start Poll” button at the top of the screen. I can create questions ahead of time, or real time during class, to poll the students with.
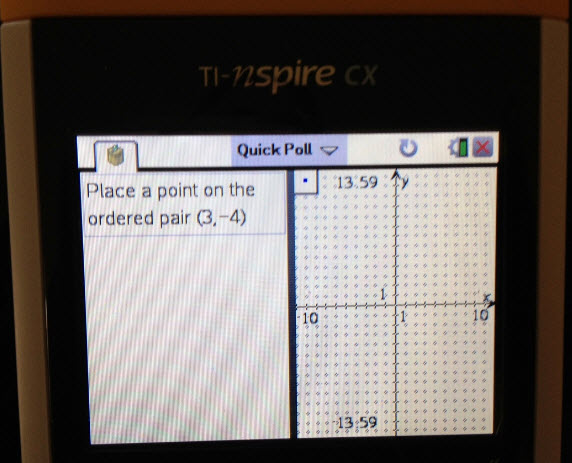
The photo above shows what was sent to the calculators. As you can see they have a split screen with the question and a set of axes to plot their point on. The students use the track pad on their calculator to move the point to the desired location.
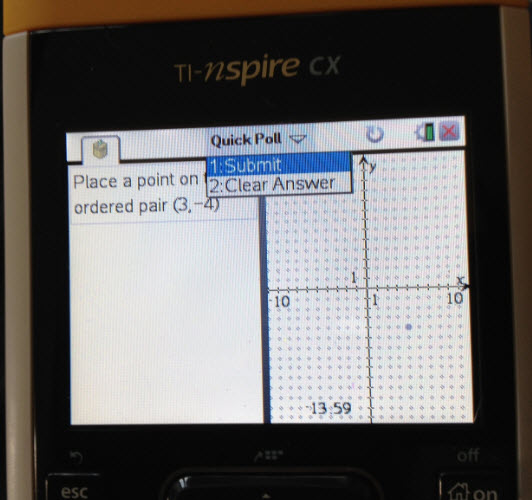
Once they have answered the question, they hit the “Doc” key and choose “submit” (they are submitting their document to my computer). The teacher’s computer then shows that student has responded.
The teacher can hit “Stop Poll” at any time to stop the students from being able to answer the question any longer, and gather all the data. The data is stored on the computer and the teacher can access it immediately, or look through individual student responses outside of class.
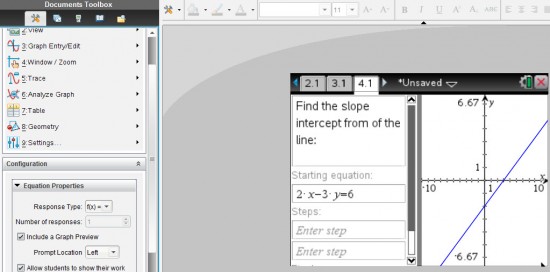
The system allows the teacher to set up questions where students can show steps, and the teacher can show multiple pieces of information in the question, like the question and a graph as seen below.
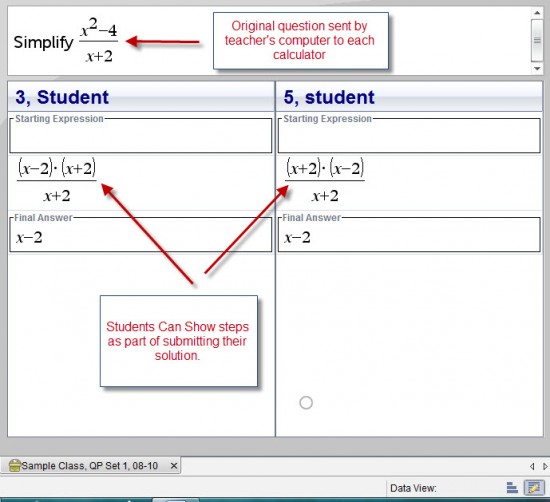
When the students submit their solution, the work is shown as you can see below (different question I was playing with).
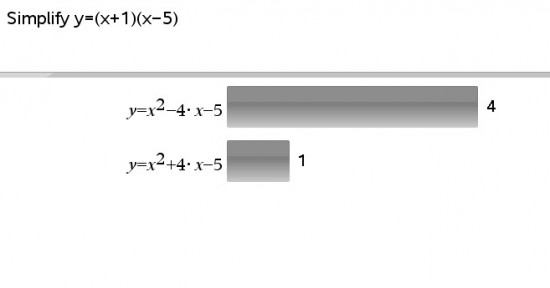
The teacher can also look at the solutions of the class as a whole (another different question):
The question is always shown with the solutions given by the students., but this view is nice for the students to be able to see (anonymously) what the different answers looked like from the class.
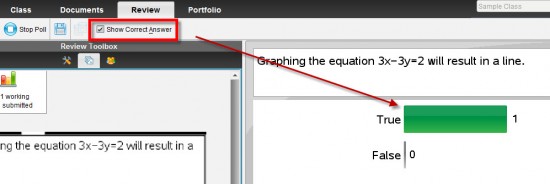
If the teacher creates the question with a “correct answer”, then the solutions the students submit will be scored as correct or not (the teacher can even give more than one correct answer!).
I realize this is a lot of information at once, but I was hoping that some of you would be as excited as I am about using the TI-nspire CX with the TI Navigator system as a student response system (clickers) in class!
I will write more after I start using it in my Algebra classes and let you know how it is going.


